

3. Quickstart: Getting Opstream Ready (Admin Best Practices)
This section walks Admins through the recommended setup order for Opstream.
Following these steps will help you get value quickly while avoiding rework later.
Goal: a clean, scalable foundation – not everything at once. Follow these steps in order.
3.1 Who This Section Is For
This section is intended for:
-
Admins setting up Opstream for the first time
-
Admins restructuring or re-launching their workspace
-
Teams onboarding new workflows incrementally
If you are a Requester or Approver, you can skip this section and go directly to the Role-Based Guides.
3.2 Step 1: Set Up Integrations First
Navigation: Admin → Integrations

Integrations affect how data flows through workflows, how vendors are created, and how spend is tracked.
Setting them up early prevents having to rebuild schemas later.
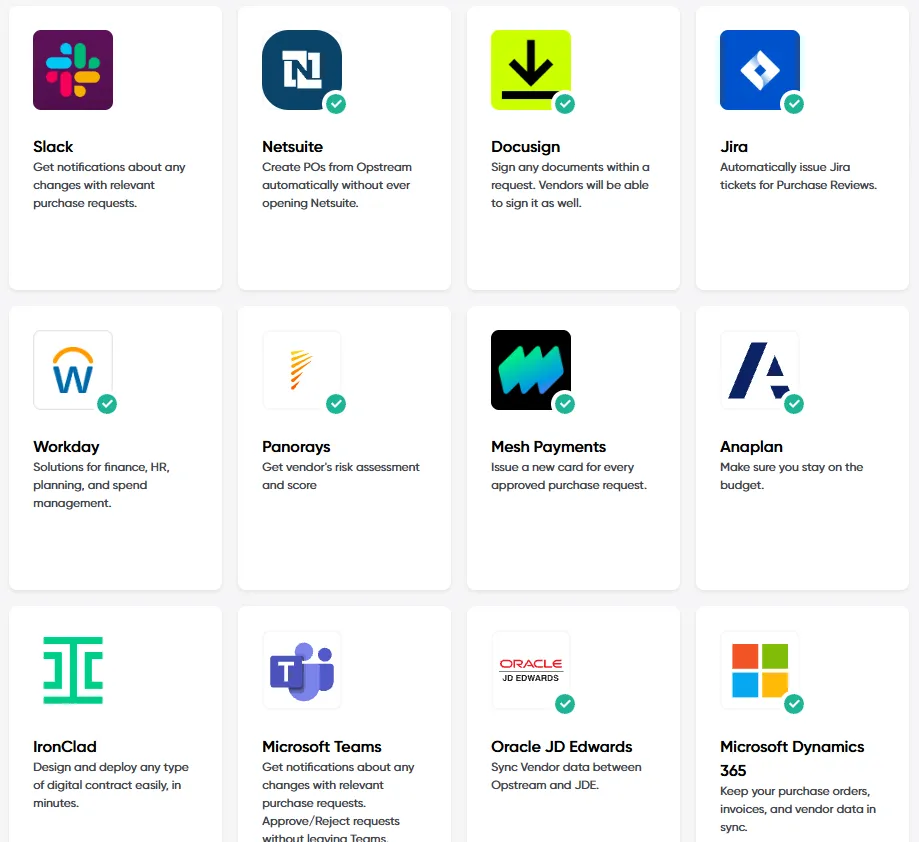
Recommended integrations to configure first:
-
ERP: Enables PO creation, vendor sync, spend tracking, and analytics.
-
eSignature: Required if contracts are part of your workflows.
-
Slack / Email: Improves adoption by delivering notifications where users already work.
Best practice
-
Even if you don’t plan to use all integrations immediately, connect the core ones (ERP, identity) before building schemas.
-
Review available integration guides from each integration tile.
3.3 Step 2: Configure Users, Roles, and Departments
Navigation: Admin → Users & Authentication | Admin → Departments
This step is about defining who uses Opstream and how they are organised. There are three things to configure: the roles that control what each person can see and do, the identity provider connection that keeps users in sync, and the department structure that drives approval routing, analytics, and visibility.
3.3.1 Users and roles
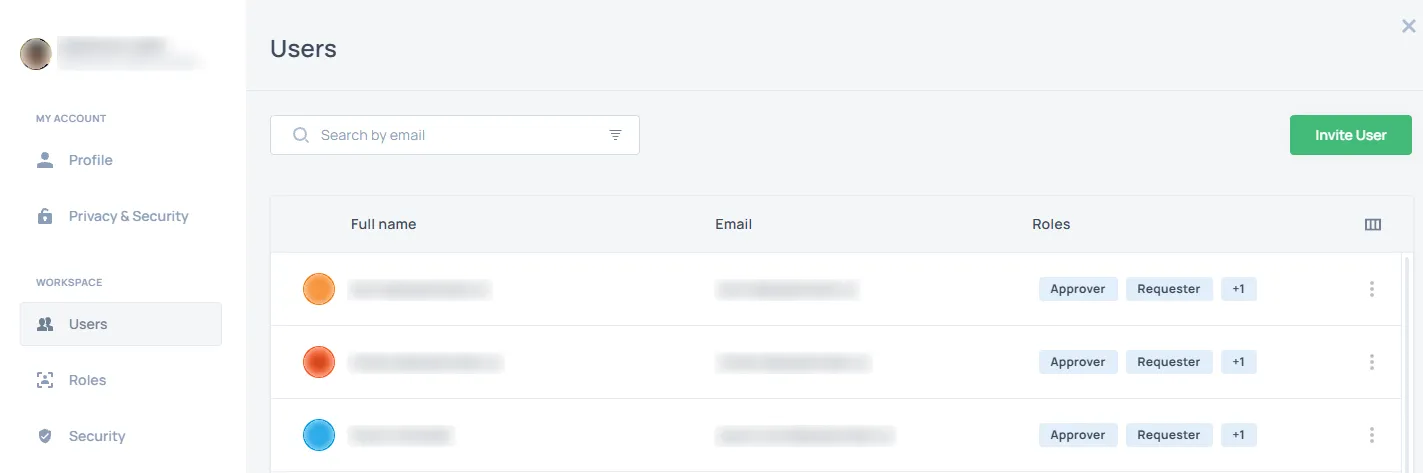
Every user in Opstream has exactly one role. The role controls what they can see, submit, and configure.
-
Admin: full access – configures schemas, approval flows, integrations, attributes, and all user settings.
-
Approver: reviews and acts on requests assigned to them or their department. Can view vendors, software, documents, and events.
-
Requester: submits requests and tracks their own. Can view the vendor and software catalog.
-
Limited Requester: submits requests only. Cannot see vendors, software, documents, events, or analytics.
Assign roles at Admin → Users & Authentication. Confirm that anyone who will be assigned as an approver or cost center owner in a workflow has the Approver role before you build schemas.
3.3.2 SSO and provisioning
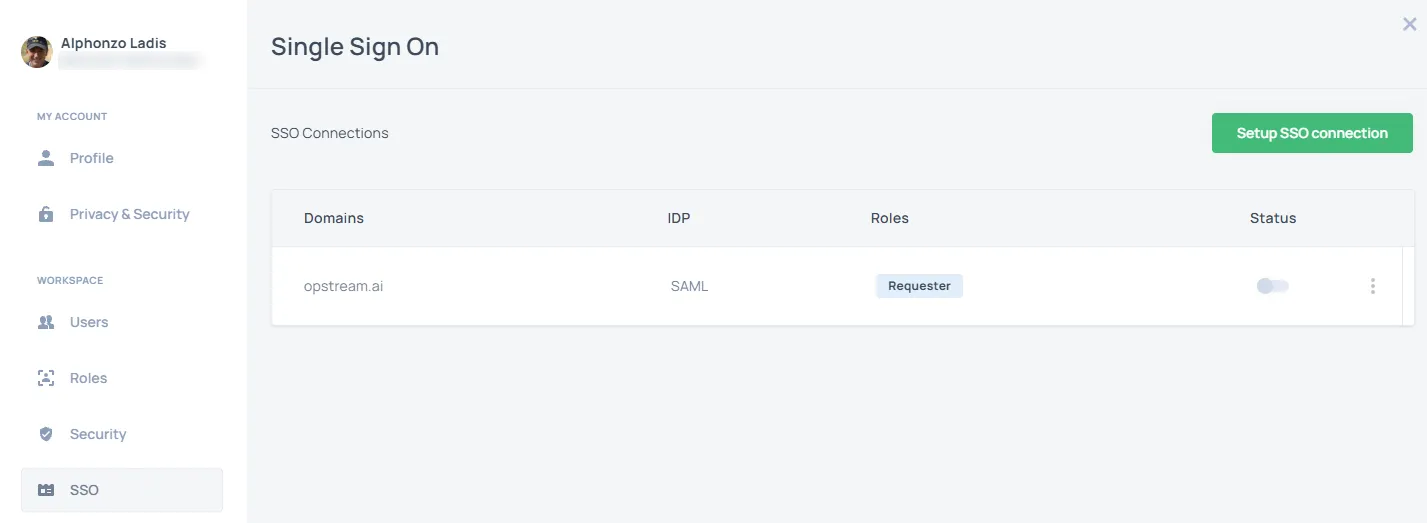
If your organisation uses an Identity Provider such as Okta, Google, or Microsoft, connect it before managing users manually. Your IdP is the authoritative source for users, departments, and reporting lines – Opstream should reflect it, not duplicate it.
SSO lets users log in with their existing IdP credentials. It also maps IdP groups to Opstream roles, so the right people get the right access from day one.
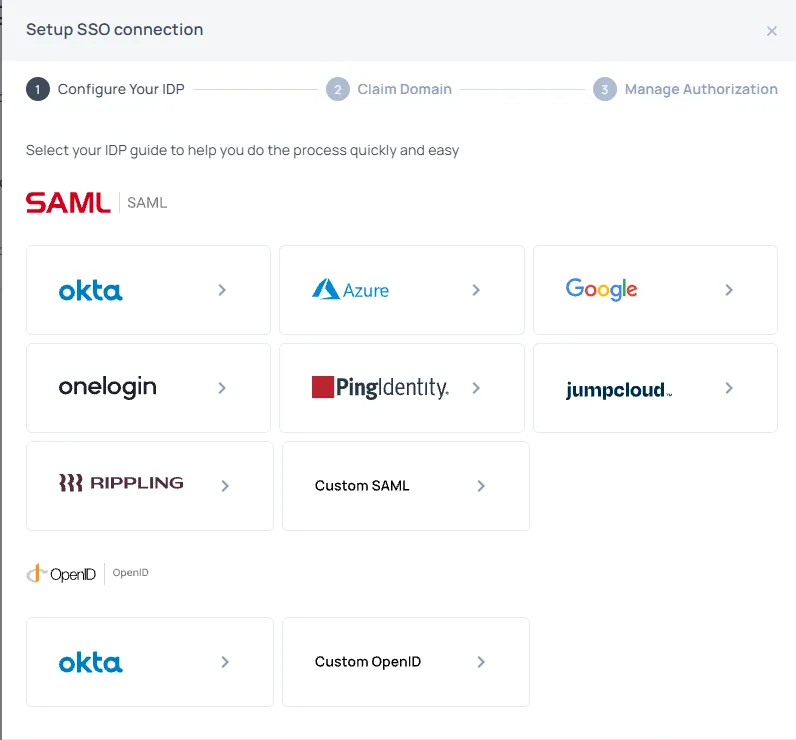
To configure, go to Admin → Users & Authentication → SSO → Setup SSO Connection, select your IDP guide to help you do the process quickly and easily, until you reach the ‘Manage Authorization’ step. From there you set:
The default role for all newly provisioned users – typically Requester
Role mappings for specific IdP groups – for example, Managers group → Approver + Requester, Admins group → Admin + Approver + Requester
For bulk role changes – such as moving all managers into an Approver group – do this in your IdP using its bulk assignment tools. Opstream picks up the changes automatically on the next provisioning sync.
Provisioning (SCIM) syncs your IdP directory with Opstream continuously in the background – no login required. New hires are created automatically, offboarded users lose access immediately, and role changes take effect as soon as group memberships update.
To configure, go to Admin → Users & Authentication → Provisioning → Add Connection
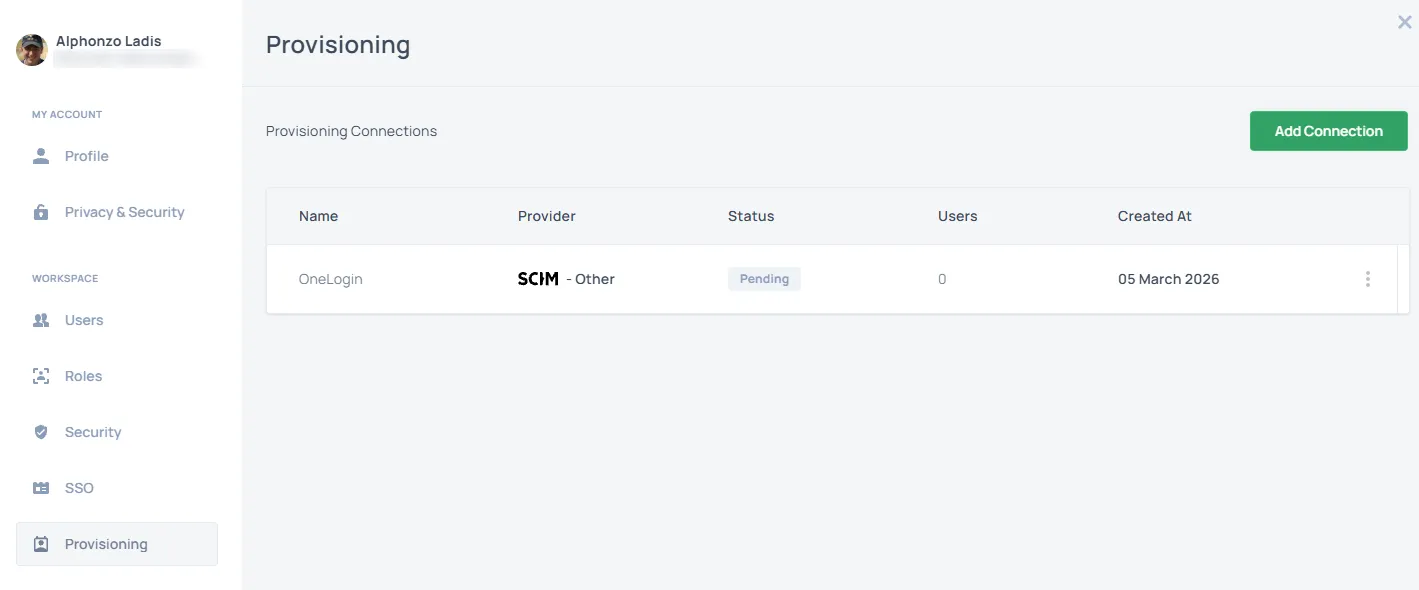
Note: SAML attribute values such as department, title, and manager update at login only. For real-time department and manager data, use SCIM.
3.3.3 Departments
Navigation: Admin → Departments
Departments are the organisational structure Opstream uses to route approvals, scope home views, and break down analytics. Set them up to mirror your real org structure before building schemas – many approval flow configurations reference departments directly.
Departments drive four things:
Approval routing: when an approval task is assigned to a department, it goes to the approvers in that department. The assignment rules on the task card determine which specific approver gets it.
Cost center ownership: each department can have a Cost Center Owner, who is used as the fallback or escalation approver in Hierarchy Review flows and Approval Brackets.
Analytics: spend, request volume, pipeline, and decision time can all be filtered and segmented by department.
Home page visibility: Home Views can be scoped to specific departments, so different teams see dashboards tailored to their workflows.
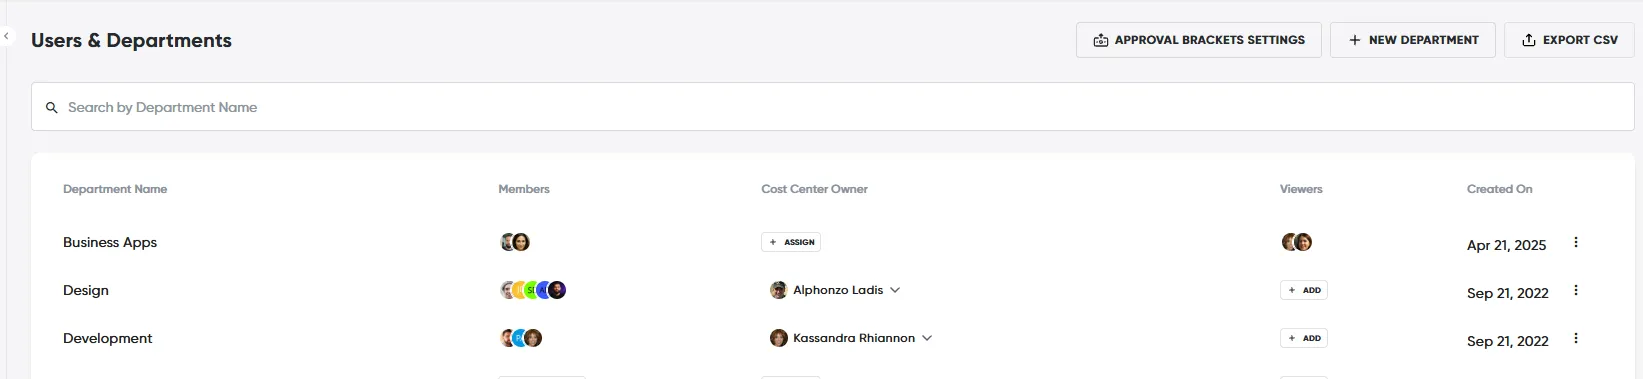
Each department has two types of participants:
Members – users who belong to the department and can be assigned approval tasks routed to it.
Viewers – Approvers who can see all requests in the department without being in the approval queue. Useful for team leads or finance stakeholders who need visibility without participating in approvals. Only users with the Approver role can be assigned as Viewers.
Best practices for this step
-
Assign Cost Center Owners before building schemas – they are referenced directly in Hierarchy Review and Approval Bracket logic
-
If using SSO/SCIM, verify that department membership is mapped in your IdP configuration so it syncs automatically
-
Add Viewers for stakeholders who need spend or request visibility without appearing in the approval queue
-
Keep role assignments lean – only grant Admin access to users who genuinely need to configure the platform
3.4 Step 3: Define Core Attributes
Admin → Attributes
Attributes define what data Opstream tracks, where it lives, and how it can be used across the platform.
They are one of the most important configuration decisions you’ll make as an Admin.
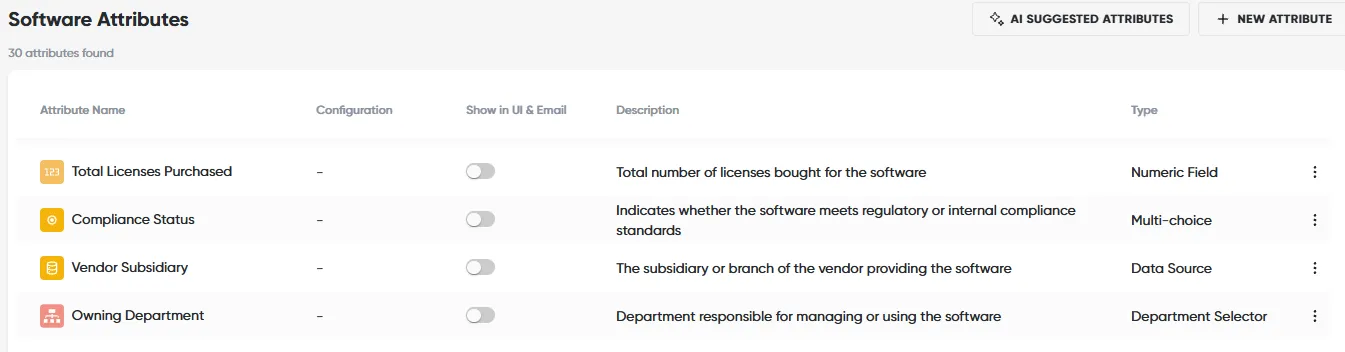
Start with a small, high-value set:
-
Contract start date
-
Contract end date
-
Total contract value
-
Owner
-
Department
-
Risk level (if applicable)
Best practice
-
Create attributes before building schemas so you can map answers correctly.
-
Prefer attributes that are reused across multiple workflows.
-
Use computed attributes for normalized values (e.g., annualized spend).
You can expand the attribute model later as needs evolve.
3.5 Step 4: Build Your First Request Type
Navigation: Admin → Schema Editor
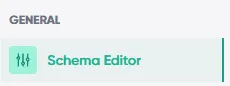
Request Types define how requests are submitted, reviewed, and approved.
Start with one core workflow, typically:
-
New Software Purchase
-
Vendor Onboarding
-
Contract Renewal
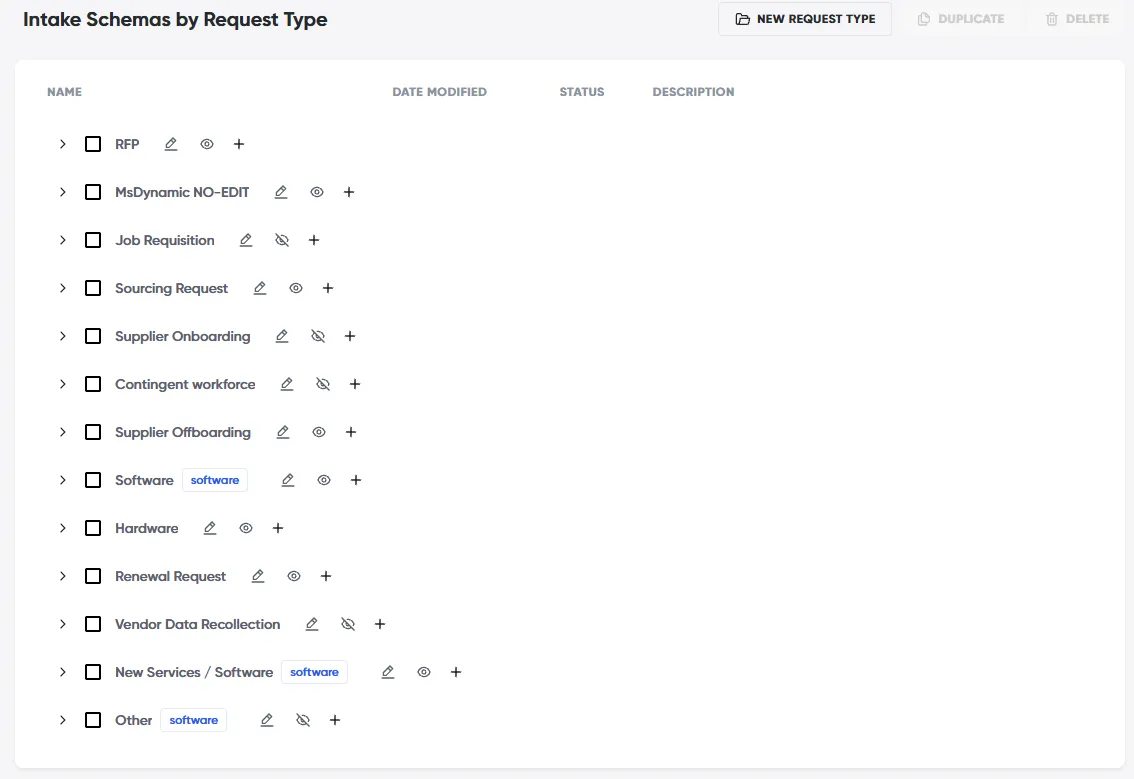
What to focus on initially:
-
Clear requester questions
-
Only required approver steps
-
Minimal conditional logic
-
One clear “end” to the approval flow (e.g., Mark as Purchased)
Best practice
-
Use an Opstream template as a starting point if available.
-
Avoid building multiple request types at once.
-
Keep the first schema simple - you can duplicate and expand later.
3.6 Step 5: Configure the Approval Workflow and Go Live
Inside the Request Type → Approver Settings**

Approval workflows control who reviews a request and under what conditions.
At this stage:
-
Define approvers and approval order
-
Add basic conditions if required (for example, spend thresholds)
-
Set target times (SLAs) for approvals
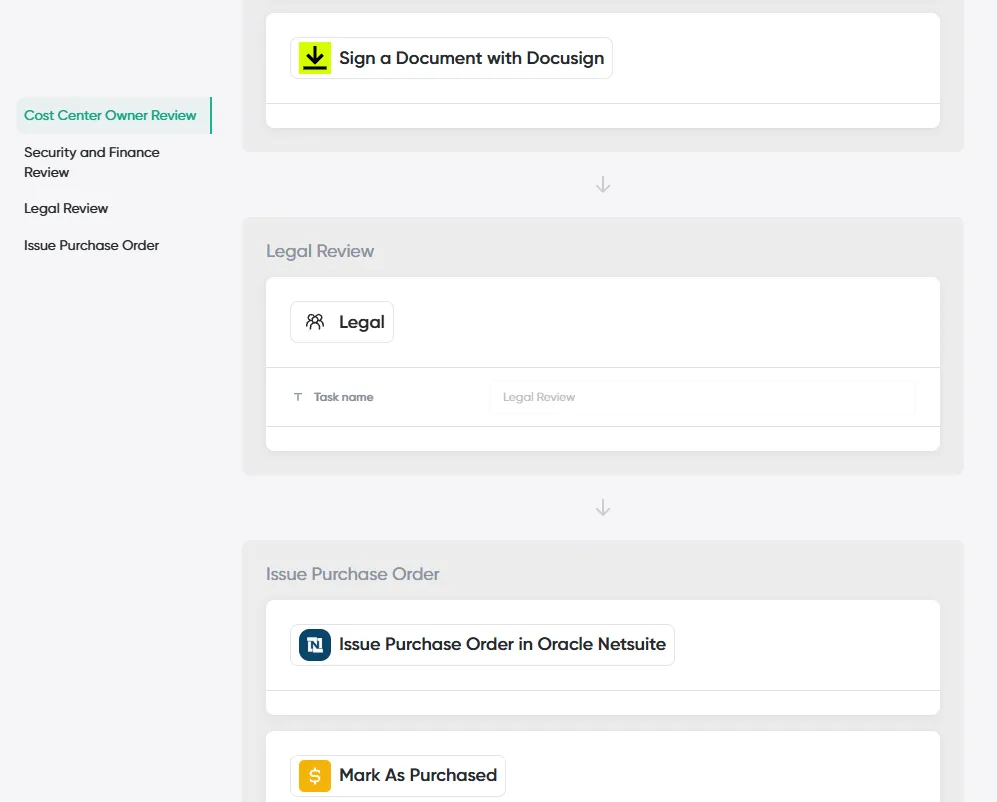
Once validated, push the Request Type live.
Recommended approach:
-
Start with a linear flow (Procurement → Legal → Finance).
-
Set realistic SLAs using Target Time on approval tasks.
-
Test with real scenarios before rolling out broadly.
3.6 Step 6: Configure Home Views
Admin → Home View Settings

Home Views control what users see when they log into the platform.
Use Home Views to:
-
Surface approvals for approvers
-
Show request status to requesters
-
Share safe, read-only visibility for limited requesters (e.g., software catalog)
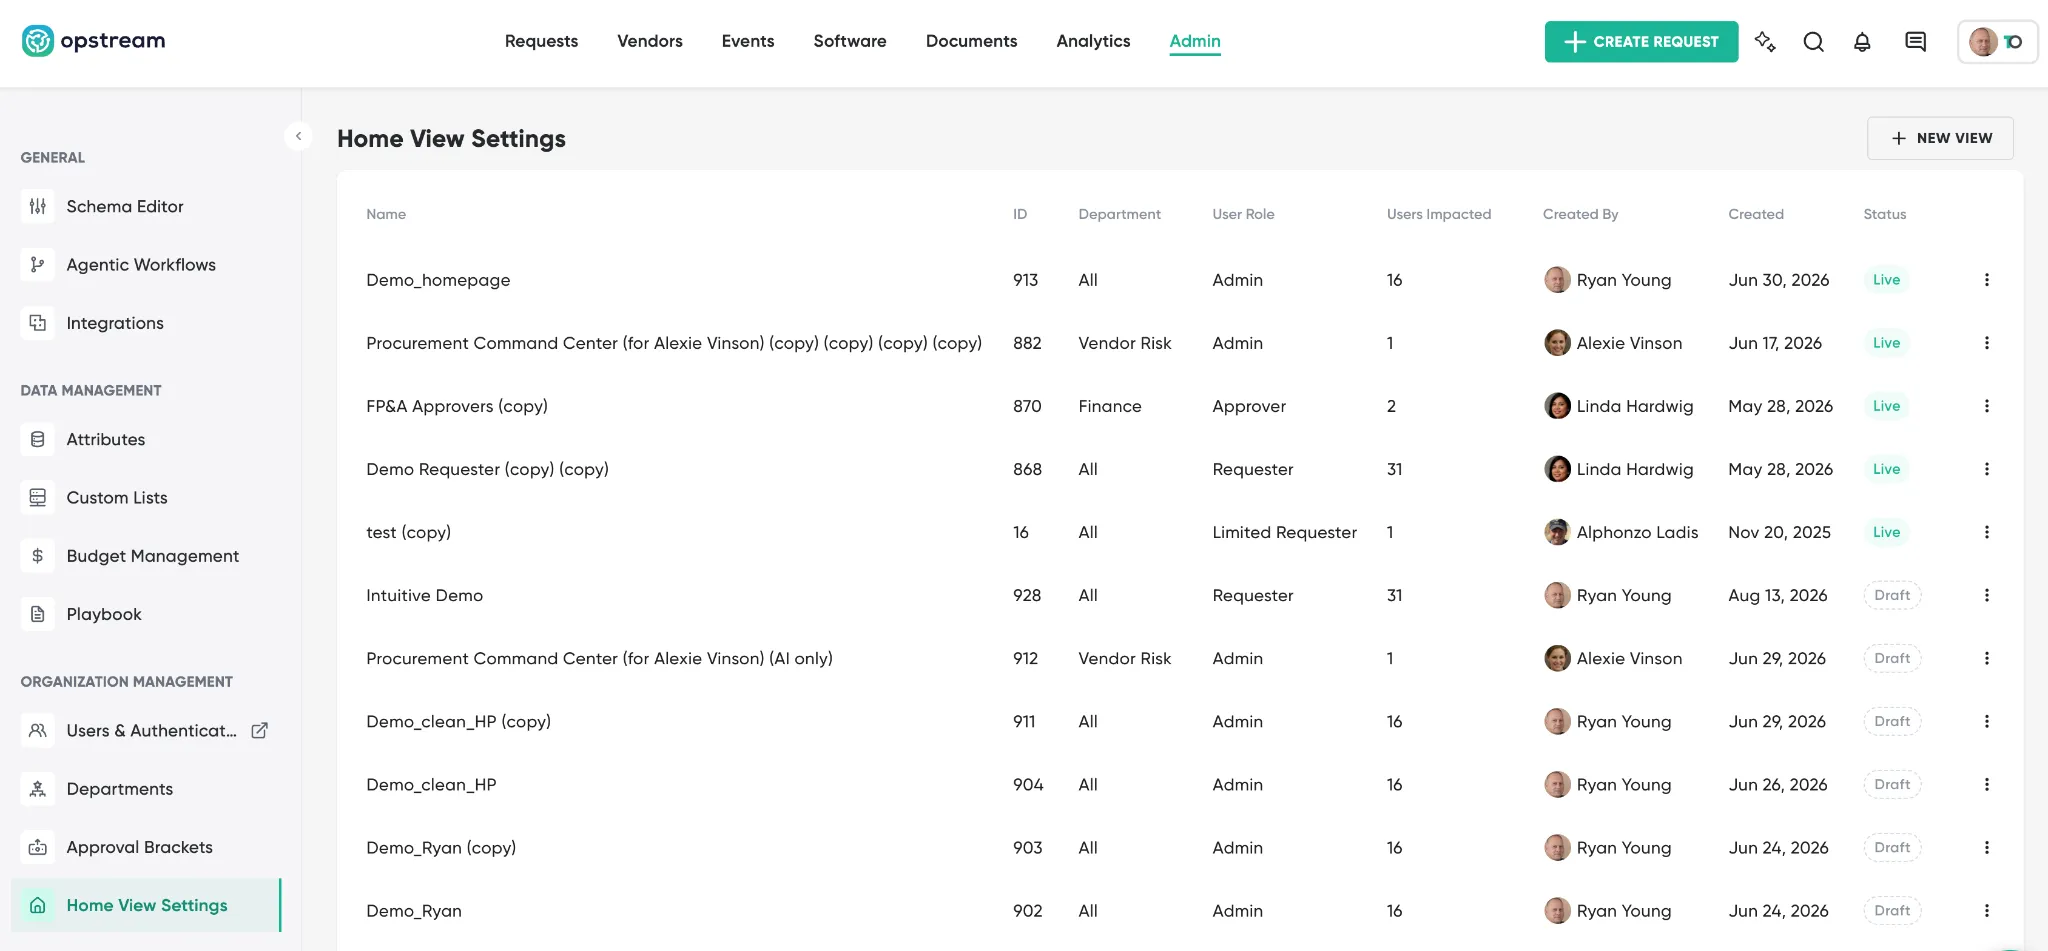
The Home Views list
Admin → Home View Settings lists every view with columns for Name, ID, Department, User Role, Users Impacted, Created By, Status (Draft/Live), and Created. Row actions (⋮): Edit (Drafts), Duplicate (incl. widgets), Push to Live (once it has a widget), Delete.
Building a view
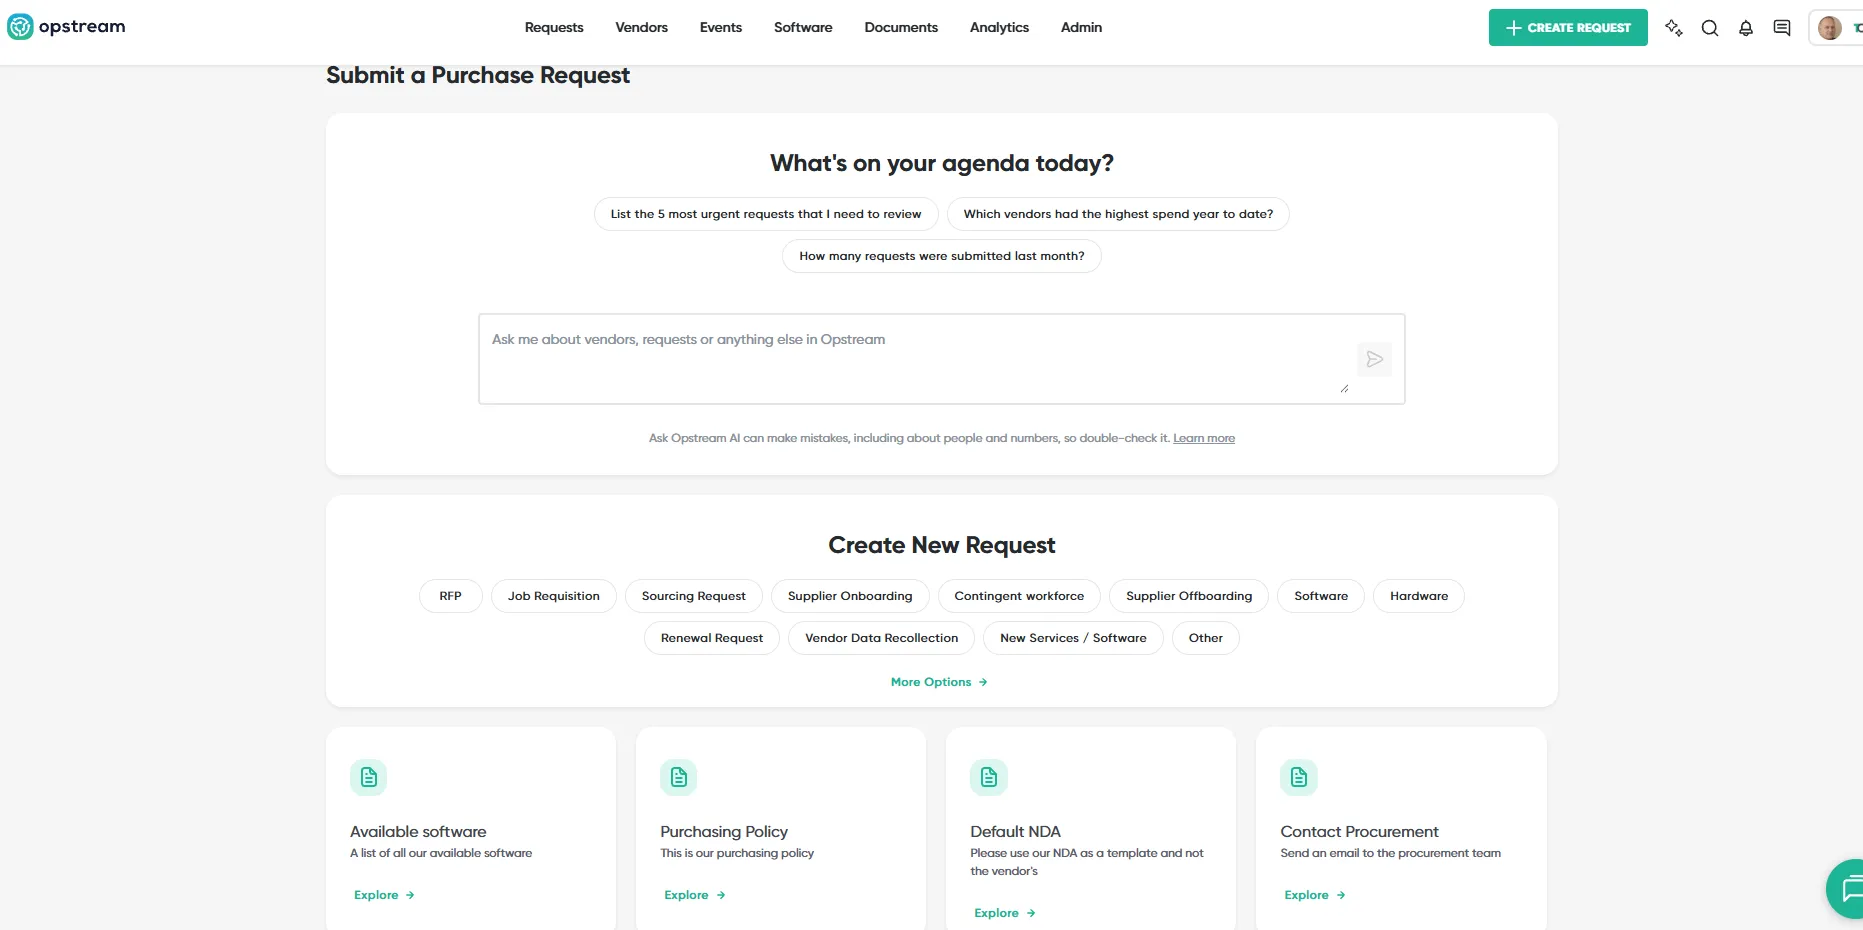
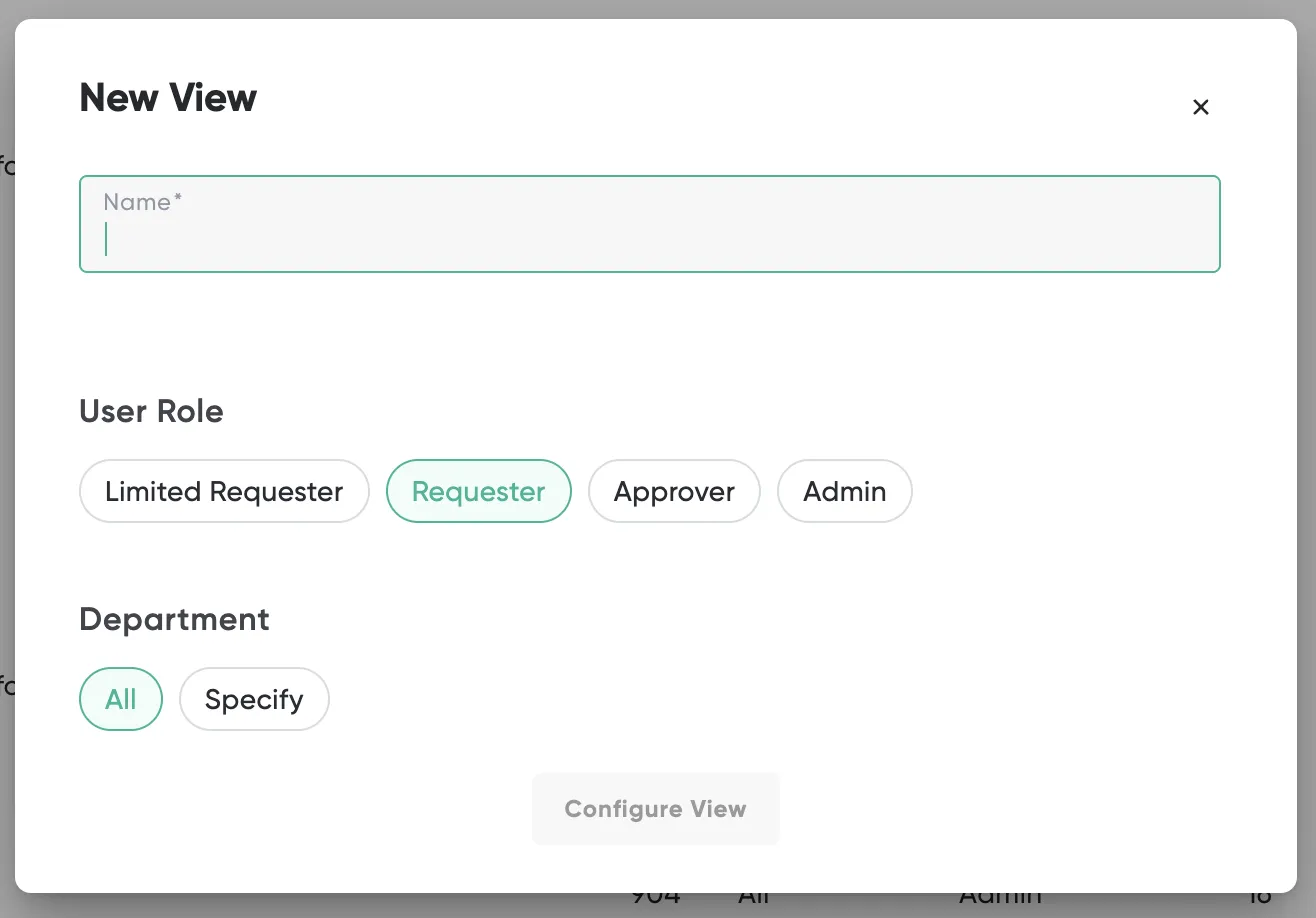
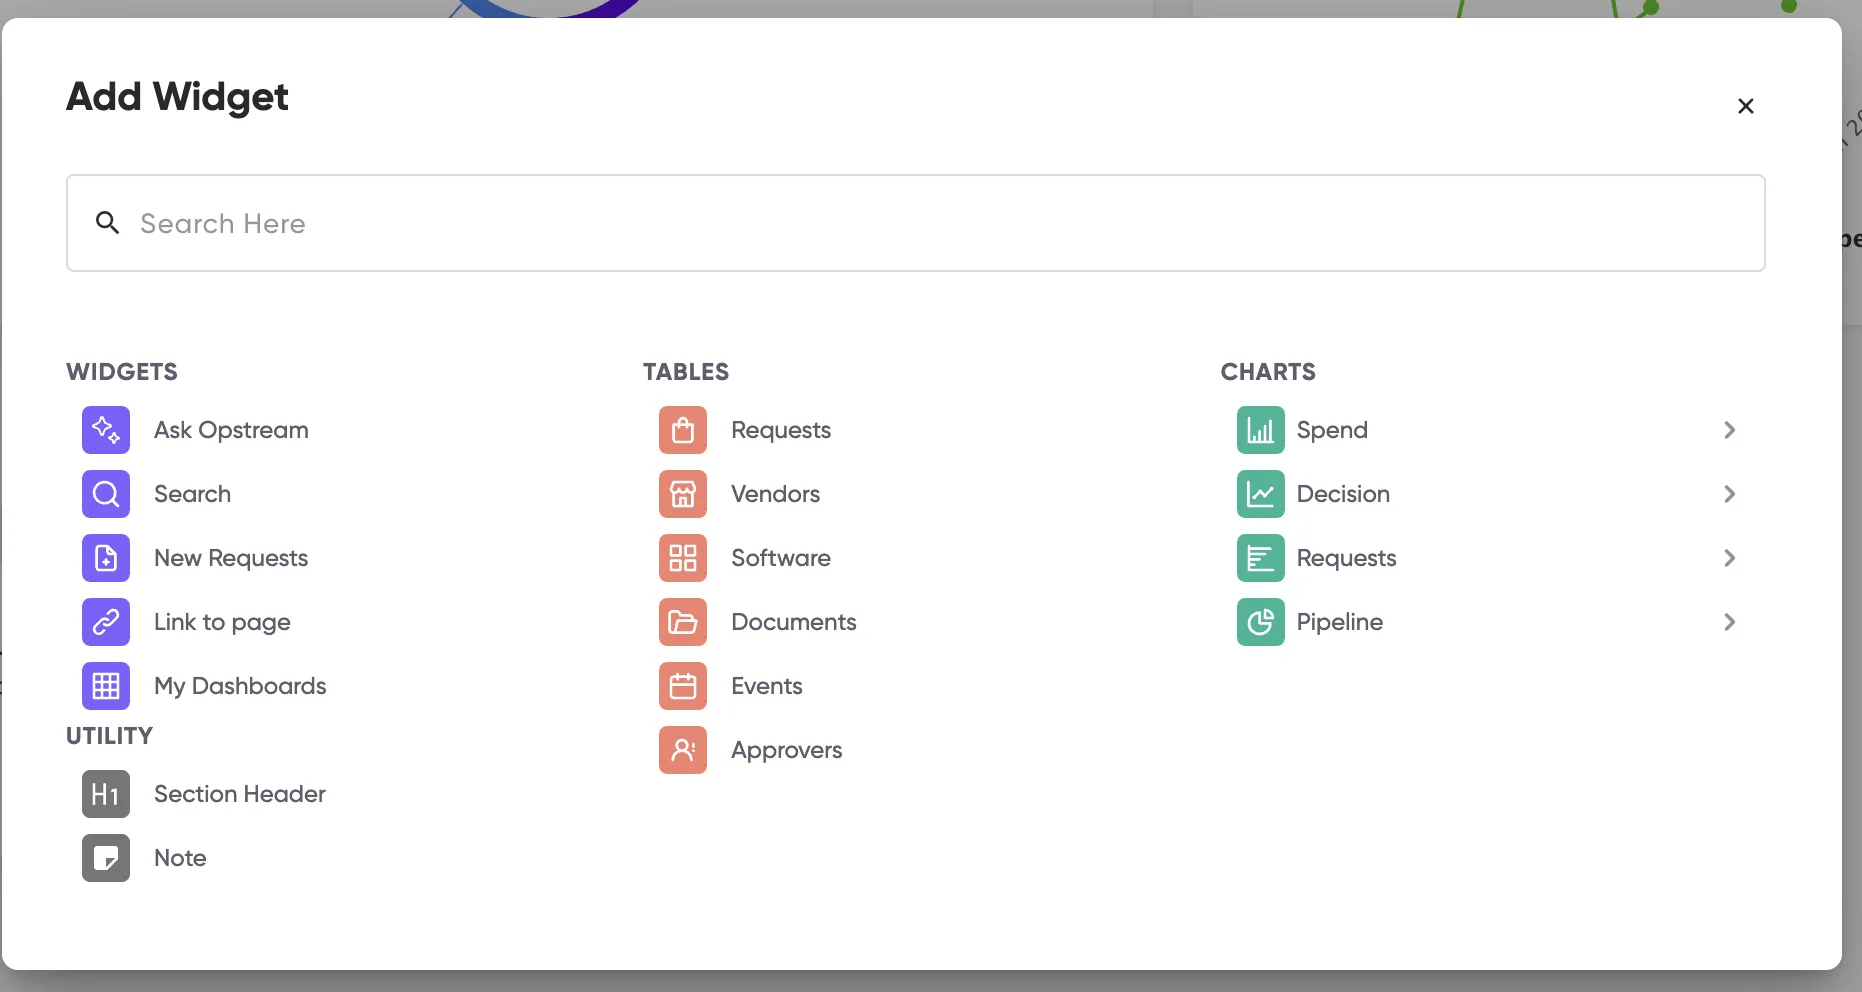
Open a view (or click New View). Set the name, department(s), and user role it targets (Limited Requester, Requester, Approver, Admin). Use Add Section to add widgets from the catalog – tables (Requests, Vendors, Software), charts (Spend, Pipeline, Decision Time), Approvals Pending Review, a Search bar, Create New Request quick-launch, an Ask Opstream / agenda widget, a Calendar, and Notes. Each widget has a settings control, a drag handle, and a ⋮ menu. The view stays a Draft while you iterate; use Push to Live (rocket icon) to publish, or Duplicate the whole view.
Best practice
-
Start with one view per role.
-
Limit widgets to what users need to act.
-
Avoid exposing sensitive data unnecessarily.
3.7 Step 7: Add Reminders and Automation
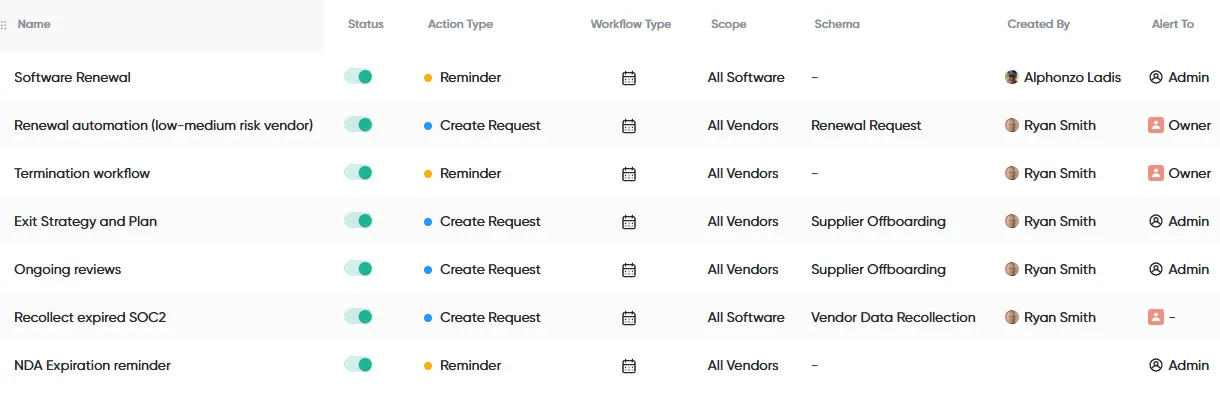
Admin → Agentic Workflows

Once core workflows are live, you can add automation such as:
-
Renewal reminders
-
Compliance expiry alerts
-
Automated follow-up requests
Pro tip: Use notifications to inform, not overwhelm!
3.8 Final Recommendation
The minimum viable setup: one integration, one request type, one approval flow. Get that live with real users before adding complexity.
A clean first setup:
-
Improves adoption
-
Reduces admin overhead
-
Makes future workflows easier to build
Once your first workflow is running smoothly, you can expand into additional request types, deeper automation, and advanced analytics.
3.9 What’s Next
After completing the Quickstart, most readers should continue with:
-
Role-Based Guides (Requester, Approver, Admin)
-
Or Deep Dive: Schema Editor for advanced configuration
This site uses anonymous analytics to work out which pages are useful. Visits are not tied to anyone, and nothing you type is recorded. See the Opstream privacy policy.