

4.2 Approver Guide: Reviewing and Managing Tasks
The Approver role involves reviewing and making decisions on requests assigned to them or their department. Approvers benefit from enhanced visibility into the financial context of the request to facilitate faster, data-driven decisions.
Approvers: this section is your complete reference. For budget context see Section 6.2; for contract comparison see the AI Bundle’s Document Comparison section.
4.2.1 What Approvers Can Do
-
Review requests assigned to them or their department
-
Answer internal questions
-
Approve, reject, or reassign reviews
-
View related vendor, software, and request data
-
Track approvals within their scope
-
View and manage documents (contracts, compliance certificates, invoices) attached to vendors, software, and requests
4.2.2 Managing Your Approval Queue

-
To Review: This section, accessible from the Requests menu, shows the requests currently assigned specifically to you.
-
Department Reviews: This section shows requests pending review from your entire department.
-
Archived: Requests that users have intentionally moved out of the active Requests view. Archiving helps keep your main Requests list focused and does not delete the request or its data. Archived requests remain accessible and can be viewed or unarchived later if needed.
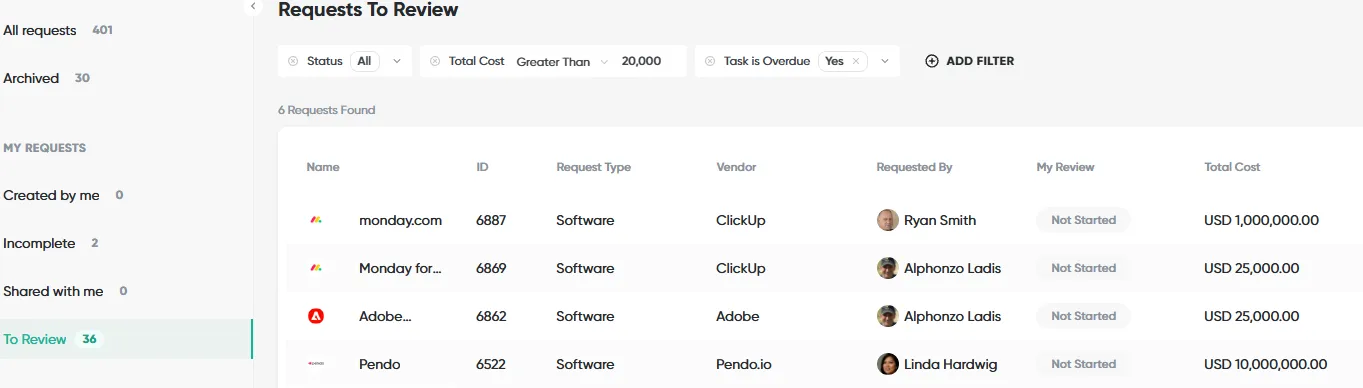
4.2.3 Reviewing a Request
When opening a request, approvers can see:
-
Requester answers
-
Vendor responses (if applicable)
-
Linked documents
-
Products & Insights (alternatives, budget or spend context if enabled)
-
Approval flow status
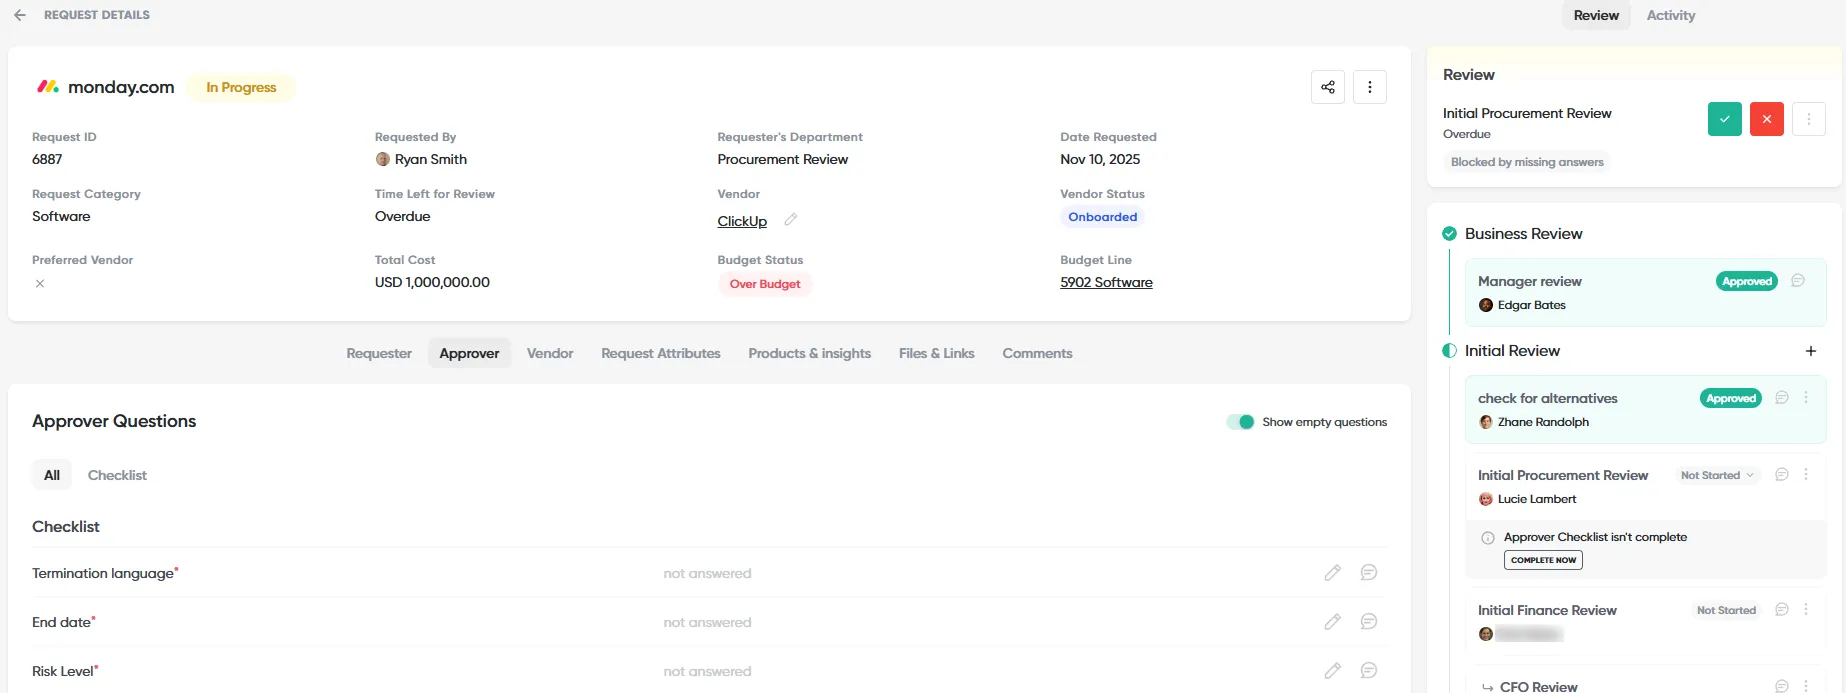
Approvers complete their task by:
-
Answering required approver questions
-
Reviewing attached documents
-
Taking an action (Approve, Reject, or Extend)
4.2.4 Approver Actions
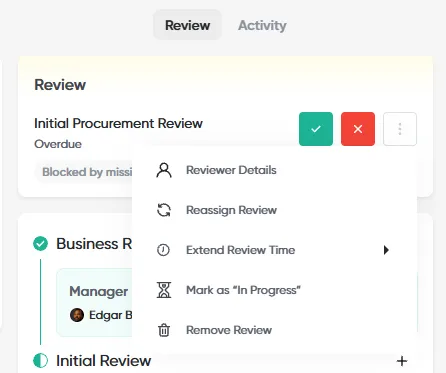
From the approval task menu, approvers are able to:
-
Approve or reject the request
-
Reassign the task to a different approver
-
Mark the task as In Progress
-
View SLA targets
Approvals may include:
-
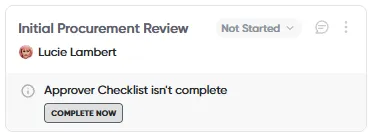
Required checklists (blocking approval until completed)
-
Optional checklists (non-mandatory questions)
Review Panel
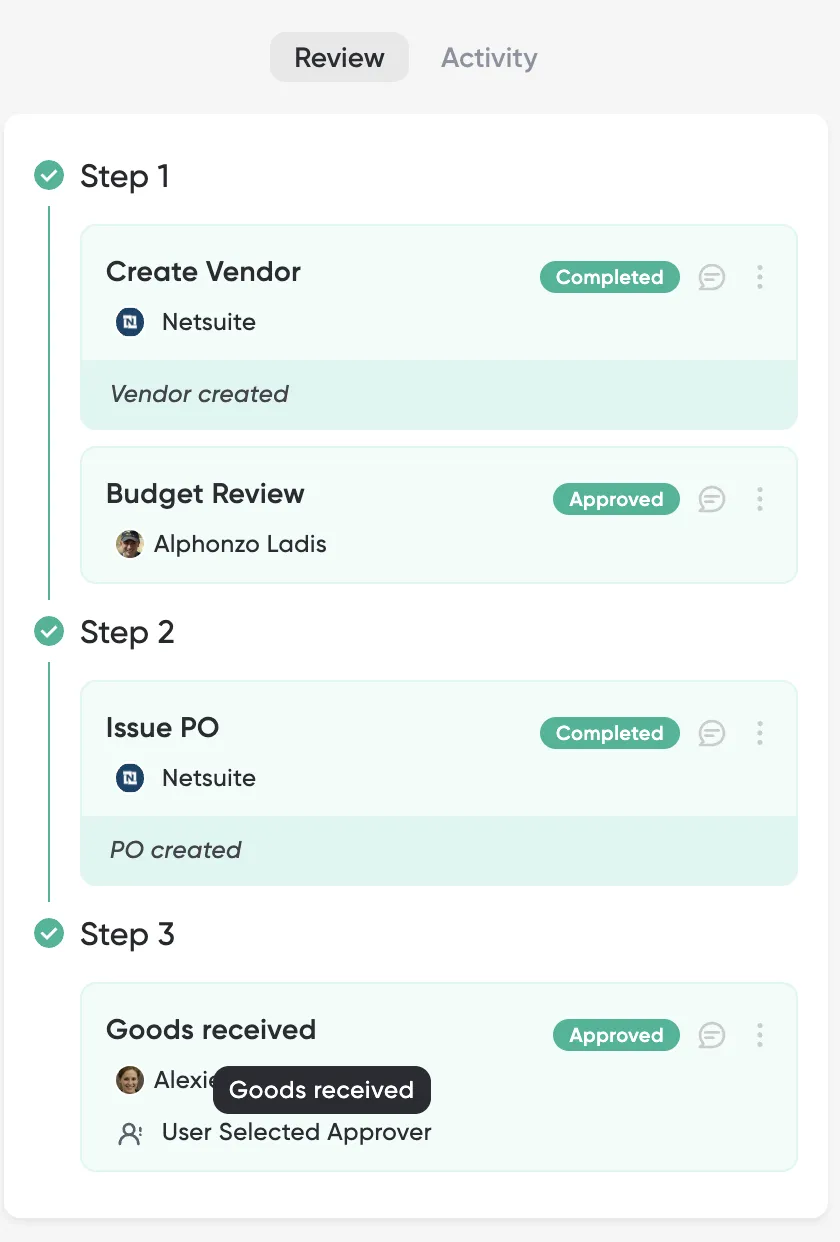
The Review panel, visible on the right side of every open request, gives all participants real-time visibility into the approval flow. Each step (row) shows the reviewer name and avatar, a status badge (Not Started, In Progress, Approved, or Rejected), green Approve and red Reject action buttons for the logged-in reviewer, and a three-dot menu for additional actions.
Approver Actions Menu
Click the three-dot (⋮) menu on your review step row to access additional actions: Approve (mark step approved), Reject (reject the request at this step), Mark as Not Started (return your step to the queue), Send Questions to Vendor (open a questions form sent to the vendor contact), and Assign Task (reassign this step to a different user).
Adding an Ad-hoc Reviewer
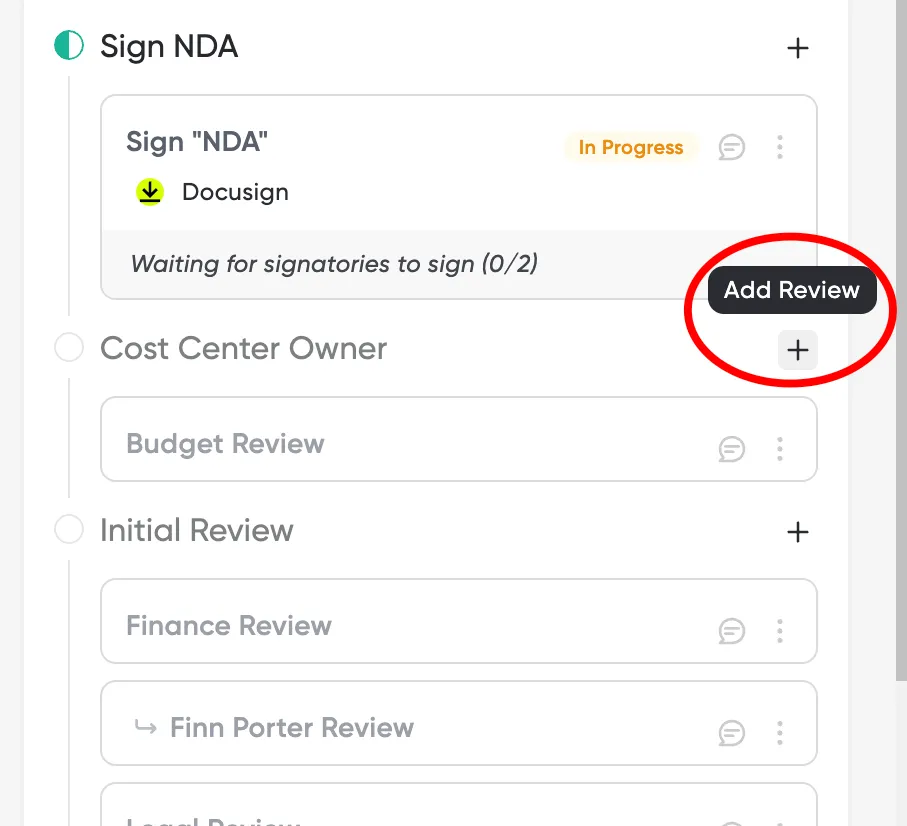
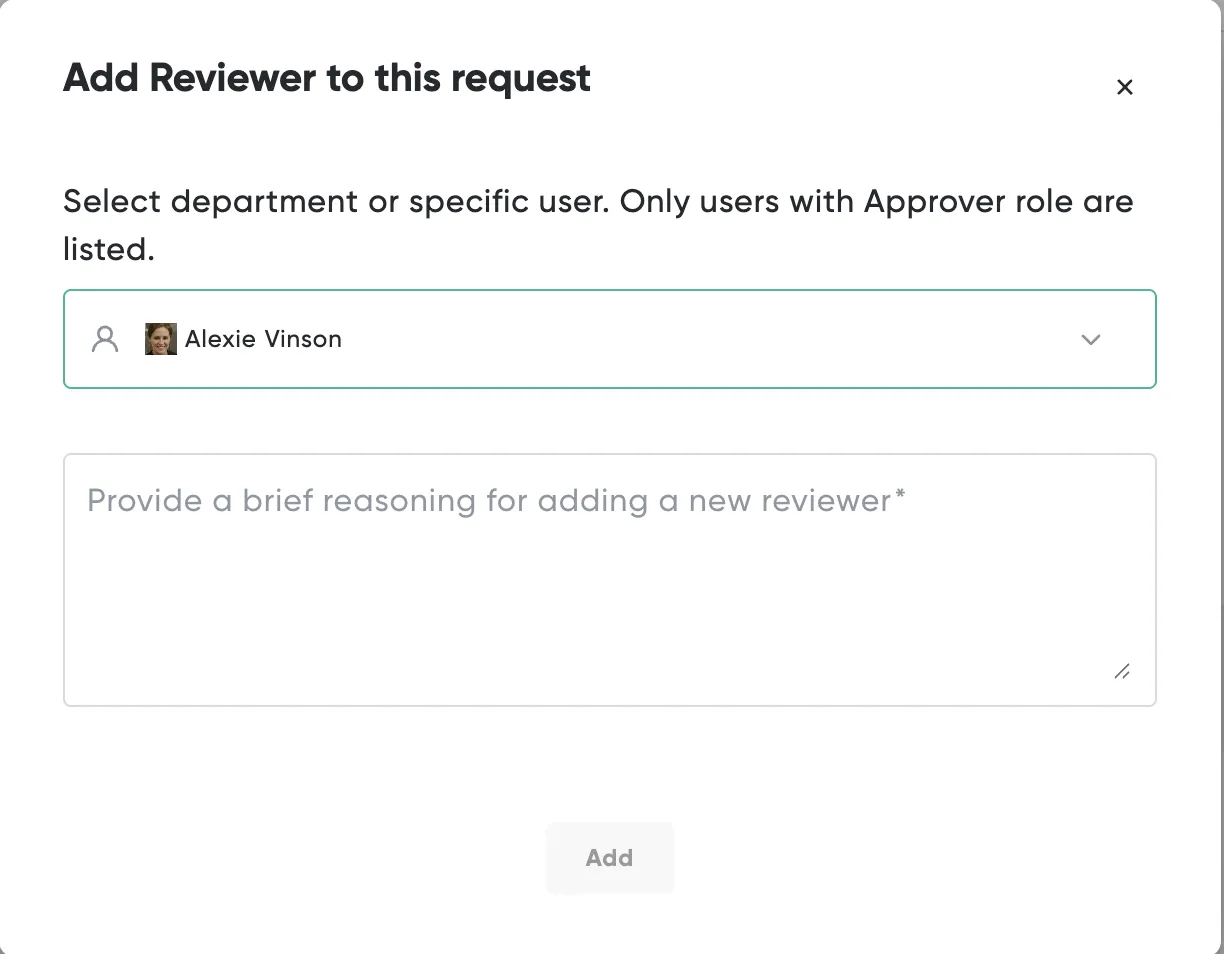
To add a reviewer to any step mid-flow, click the + icon on that step row in the Review panel. In the Add Reviewer dialog, search for and select the user to add. Note that only users whose role matches the step type can be added (e.g., you cannot add a vendor-type reviewer to an internal approval step). The added reviewer appears as a new row in the step and receives a review task immediately.
4.2.5 Understanding and Applying Custom Statuses
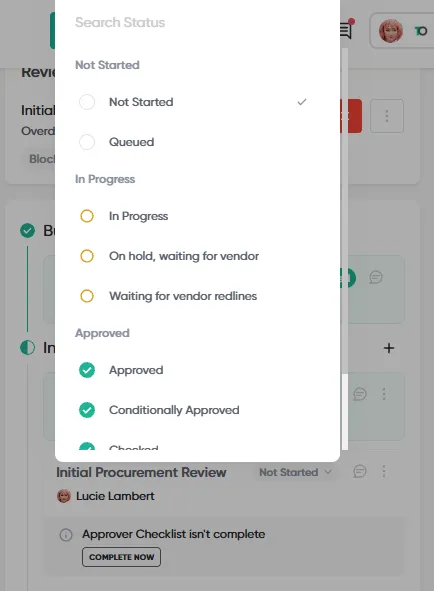
Opstream uses statuses (e.g., In Progress, Approved, Rejected) to track the request lifecycle. Custom statuses offer more detailed tracking and help teams identify bottlenecks quickly.
-
Selecting Custom Statuses: You can apply one of the custom statuses configured by the Admin to clarify where a request stands in the process. Examples include statuses like “Awaiting Legal,” “Pending Vendor Info,” “On Hold,” or “Conditionally Approved”.
-
Read-Only Status: Approvers can select from the list of custom statuses. However, Admins are responsible for the initial creation and editing of these custom statuses.
4.2.6 Collaborating and Commenting on Requests
To facilitate collaboration with Requesters or other stakeholders, Opstream provides commenting features directly within the request details.
-
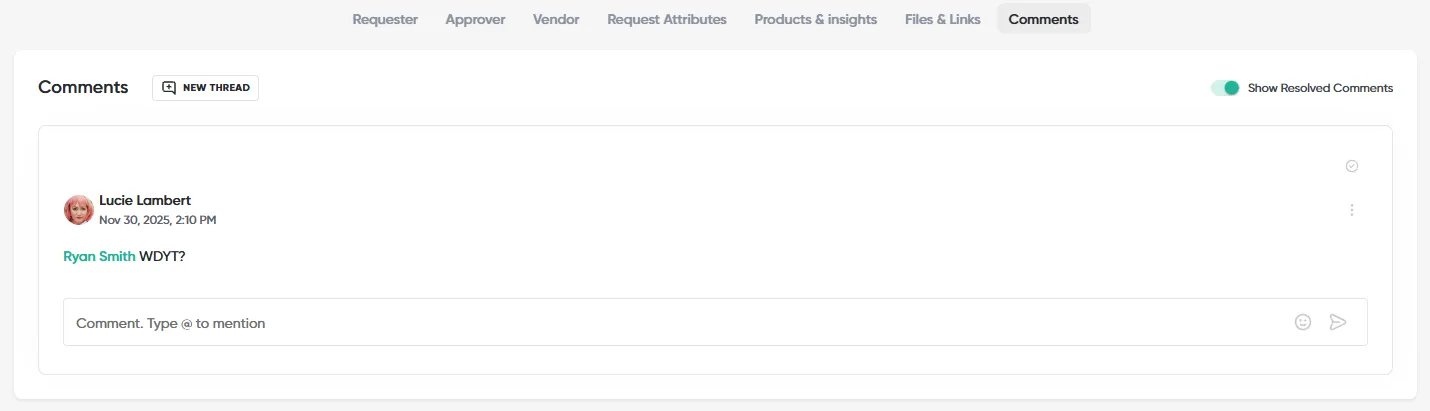
General Comments: Use the dedicated Comments section tab within the request detail page for general notes or discussions regarding the request.
-
Contextual Comments: To provide feedback on specific information, use the 💬 speech bubble icon next to any answer provided by the Requester, Approver, or Vendor to leave a comment directly on that field.
-
You can also comment directly on an Approval Task – click the speech bubble icon on a specific approval step to leave notes visible to the assigned approver
-
Mentioning Users: You can use the @mention feature within the comment field to tag and notify specific users who need to be part of the discussion.
4.2.7 Reviewing Vendor and Software Details
As an Approver, you have access to the Vendors and Software menus. This access allows you to perform necessary due diligence before finalizing an approval.
- Accessing Vendor Records

-
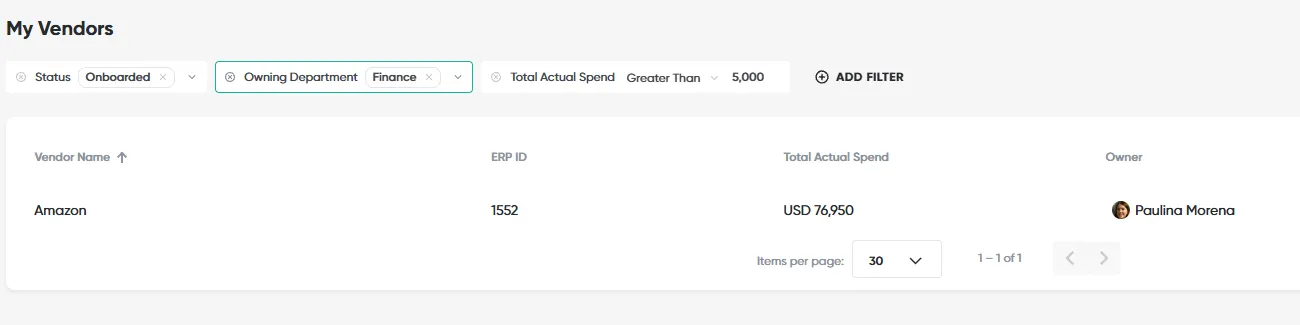
The Vendors Menu lists all vendor records and can be organized by status (Onboarded, Offboarded, In Progress).
-
You can use filters, sorting, and the Manage Columns tool to view key Vendor Attributes such as risk scores, compliance status, or contract dates.
-
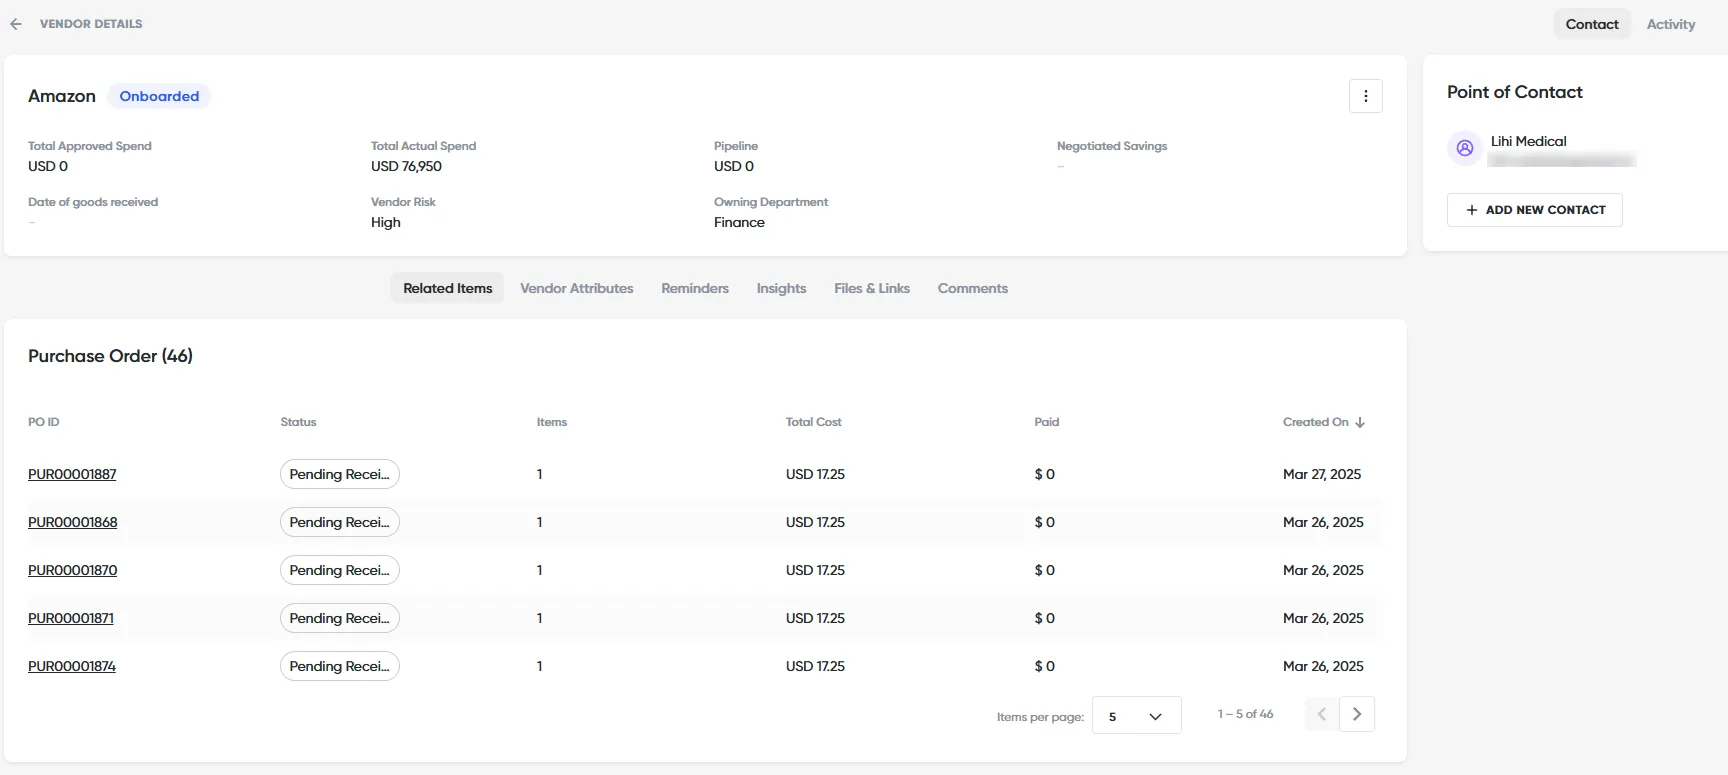
Clicking into a Vendor Detailed View shows all associated Purchase Orders (POs), requests, files, and contact information linked to that vendor.
-
The Activity tab on a vendor record shows every action taken on that vendor – including status changes, request submissions, and attribute updates – providing a full audit trail
- Accessing Software Records

-
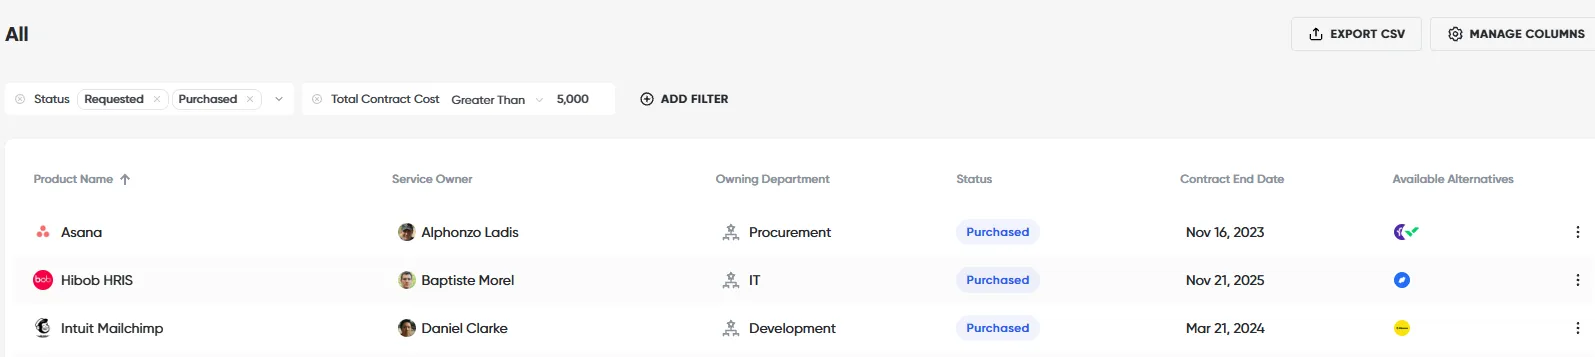
The Software Menu organizes the catalog of all software products by status: Requested, Purchased, or Terminated.
-
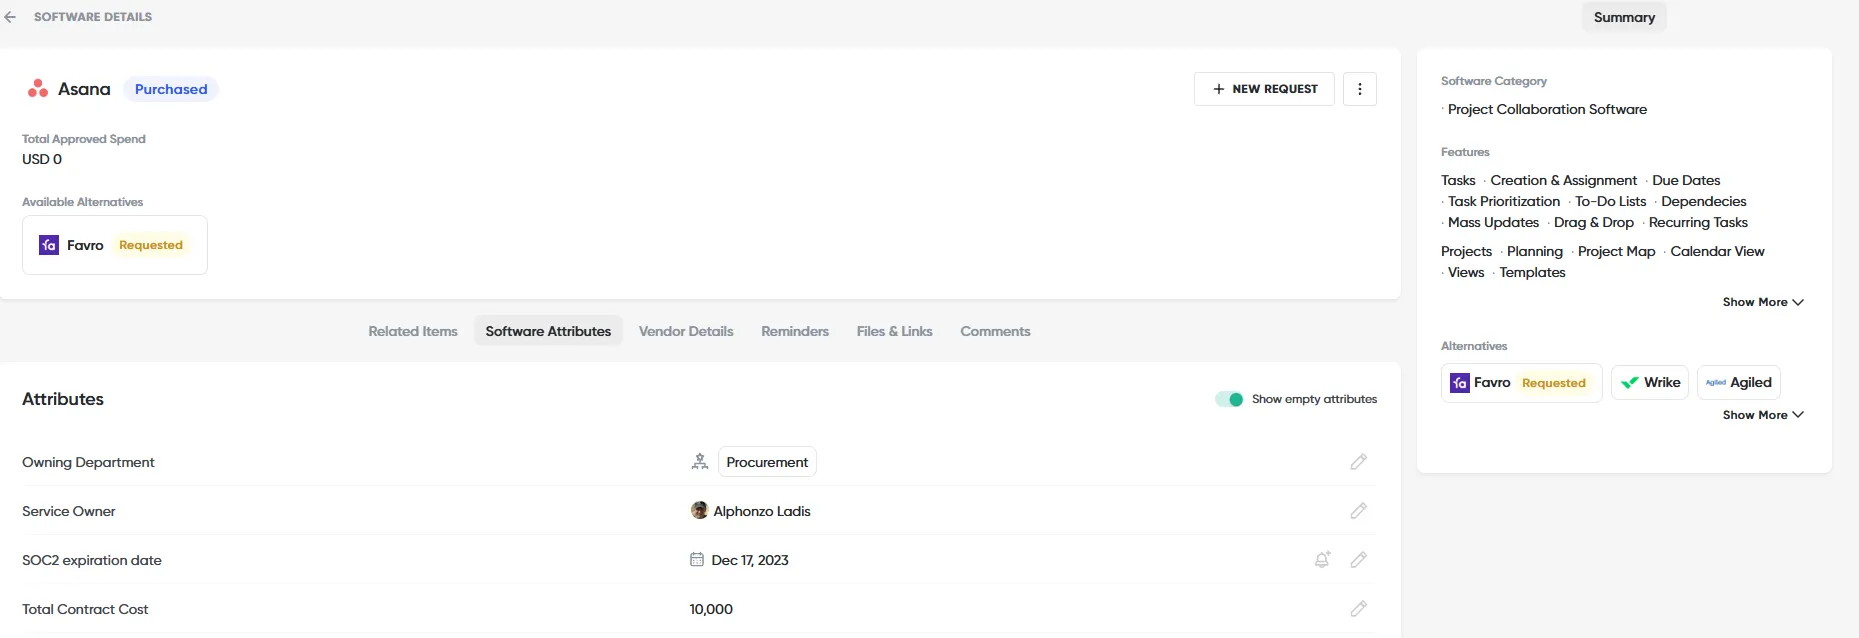
The Software Detailed View displays important information, including linked POs and requests, Software Attributes (such as renewal dates), and product information (including features and alternatives).
-
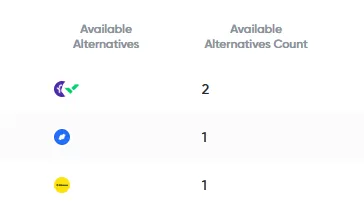
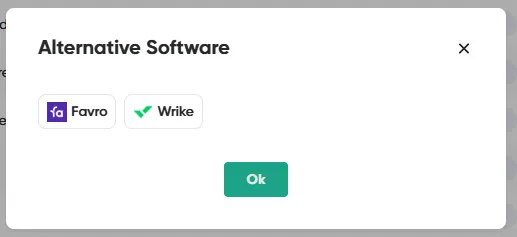
Duplication Prevention is supported in this menu via the “Available Alternatives” column, which shows which overlapping tools exist within the organization, helping support optimized spend and license management.
4.2.8 Utilizing the Documents and Events Modules
Approvers have specific access to the Documents and Events menus, enabling compliance checks and proactive management of deadlines.
4.2.9 The Documents Menu

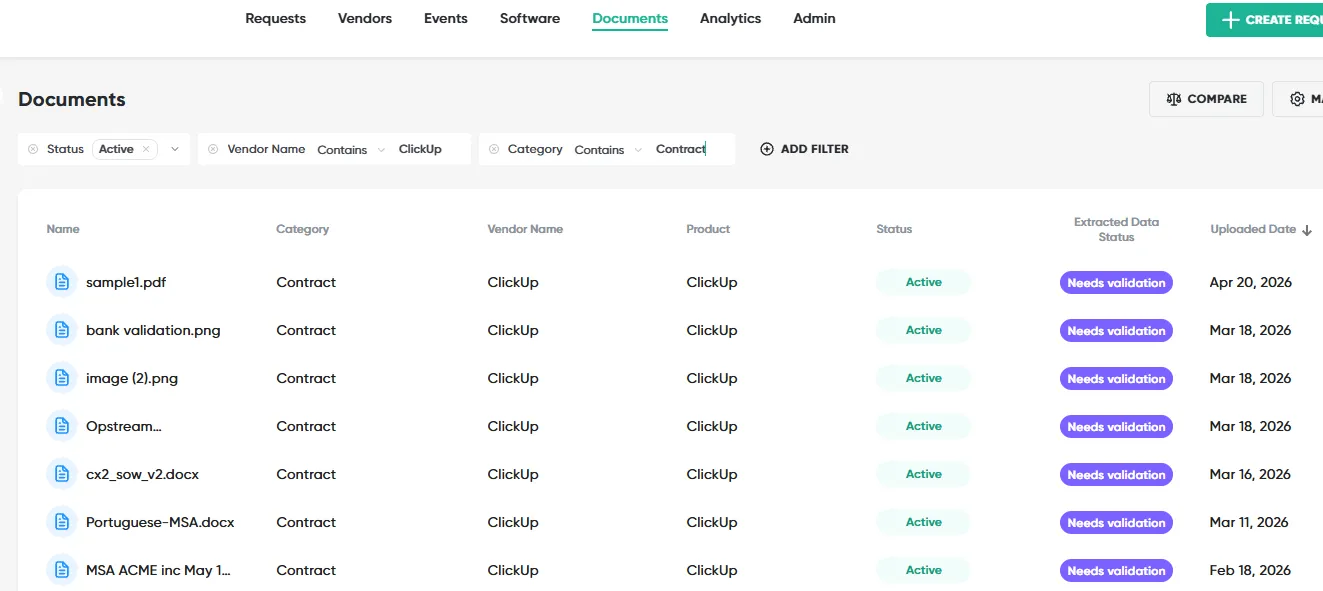
The Documents menu is where you manage all files related to vendors, software, and requests, such as contracts, compliance certificates, and invoices.
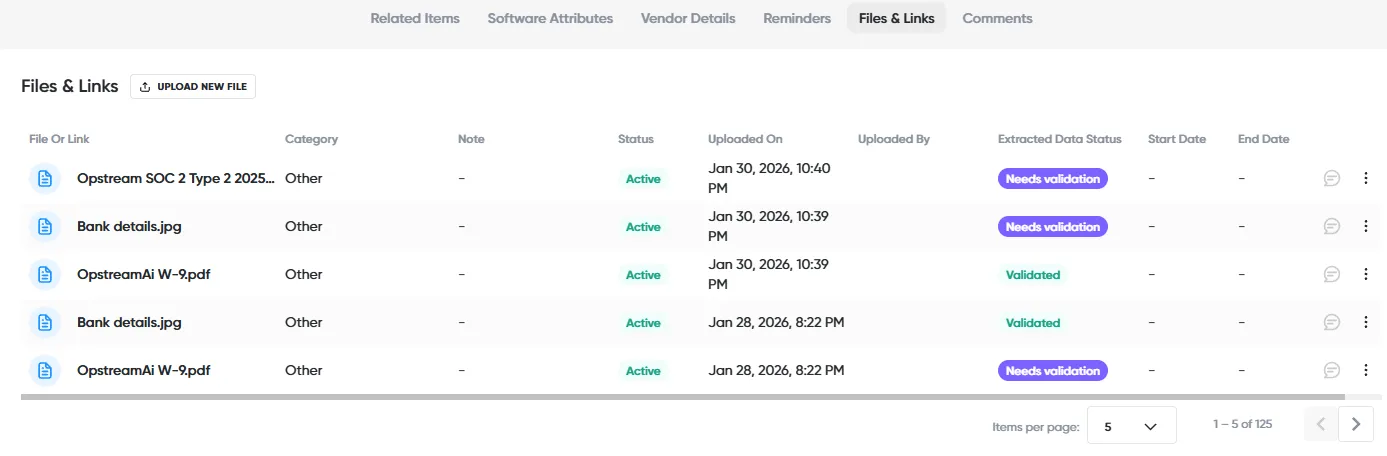
- Document Review: Within any request, Approvers can access uploaded contracts or supporting materials via the Files & Links tab.
-
Visibility: Documents attached at the Vendor or Software level are inherited and visible across related records.
-
Filtering: You can narrow the main Documents view by applying filters based on category, end date, product, vendor, or request. Documents with an expired status (past their validity period) are tracked. Every Files & Links tab – on vendor, software, and request records – uses this same filterable, sortable table, with a reduced set of columns shown by default.
-
Renaming: To give a document a readable, meaningful name, open the three-dot (⋮) menu on its row and select Rename. Renaming updates only the display name shown in Opstream – the underlying file or link is unchanged. The option is available to the user who uploaded the document and to Admins.
4.2.9.1 Using Document Comparison During Review
When reviewing a renewal or contract update request, approvers can run a Document Comparison (included with the AI Document Extraction add-on) directly from the request’s Files & Links tab to understand exactly what changed – without leaving Opstream.
-
Open the request and navigate to the Files & Links tab.
-
Locate the relevant document file record and click the Compare action.
-
Select the baseline (prior version) and proposed (new version) files.
-
Review the AI-generated summary of key changes, business impact, and risk flags.
💡 Tip for Legal Approvers: Review HIGH severity items – such as tax liability shifts, IP ownership changes, or revised payment terms – before completing your approval checklist. See the AI Document Extraction add-on (Section 6) for full details.
4.2.10 The Events Menu

The Events menu provides a proactive overview of critical deadlines derived from date-based attributes.
-
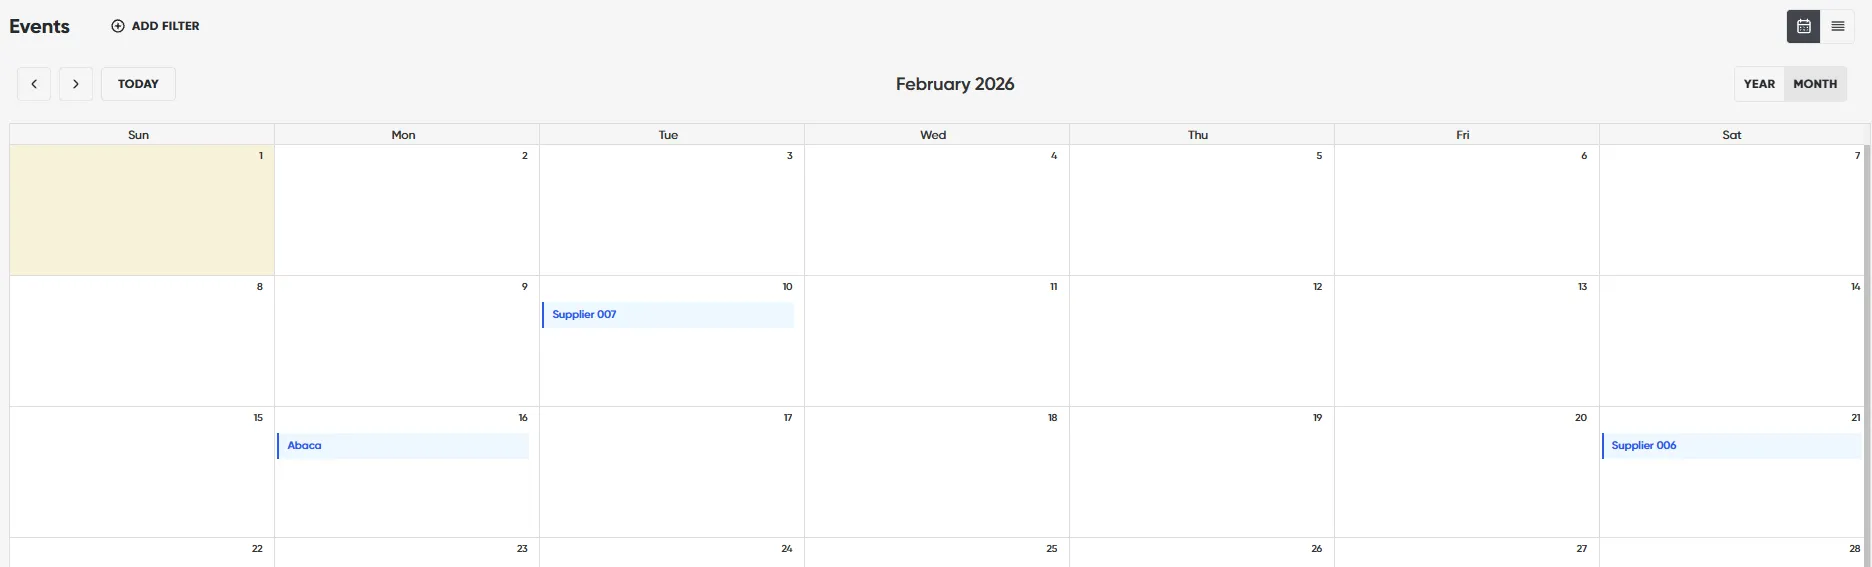
Purpose: This feature helps track upcoming events and important dates in a calendar or table view, ensuring the team never misses a critical milestone.
-
Critical Milestones: Events often track Procurement contract renewals, Legal document expiration dates, Security certification renewals, and auto-renewal deadlines.
-
Views and Filters: You can view events in Monthly, Year, or Table format. Events can be filtered by specific Software or Vendor attributes (e.g., department or risk score) or by name. This is highly valuable for ensuring compliance documents, like SOC-II reports, are not overlooked.
-
Clicking on an event opens the full details of the linked record (vendor, software, or request) directly, allowing you to take action, update attributes, or review context without navigating away from the Events calendar.
This site uses anonymous analytics to work out which pages are useful. Visits are not tied to anyone, and nothing you type is recorded. See the Opstream privacy policy.