

5.11 Deep Dive: Purchase Orders, Catalogs and Payments
Once a request is approved, Opstream can turn it into a purchase order in your ERP, let requesters buy from supplier catalogs, and send the payment to your ERP. This page explains how each piece works and how admins set it up.
5.11.1 Creating Purchase Orders in Your ERP
Opstream creates purchase orders through a step in the request type’s approval flow. In the Schema Editor’s approval settings, add the step for your ERP from Agents / Integrations:
| ERP | Step |
|---|---|
| Oracle NetSuite | Issue Purchase Order in Oracle NetSuite |
| Workday | Issue Purchase Order in Workday |
| Oracle JD Edwards | Issue Purchase Order in Oracle JDE |
| Microsoft Dynamics 365 | Issue PO with MS Dynamics 365 |
| Coupa | Create Requisition in Coupa: Opstream creates an approved requisition, and Coupa turns it into a PO |
A step only appears in the list once that ERP is connected on the Integrations page.
Step settings: Trigger (run automatically or manually), Target Time and Only If conditions, for example only when the total is over a set amount.
What goes on the PO:
-
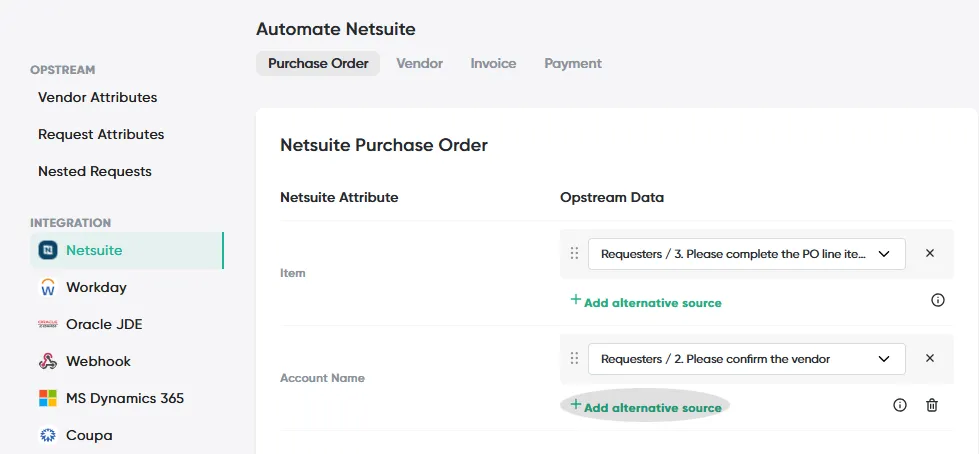
Header fields: set them on the request type’s Automation tab, under Purchase Order, by mapping each ERP field to a question answer or a fixed value (see Pushing Data to External Systems).
-
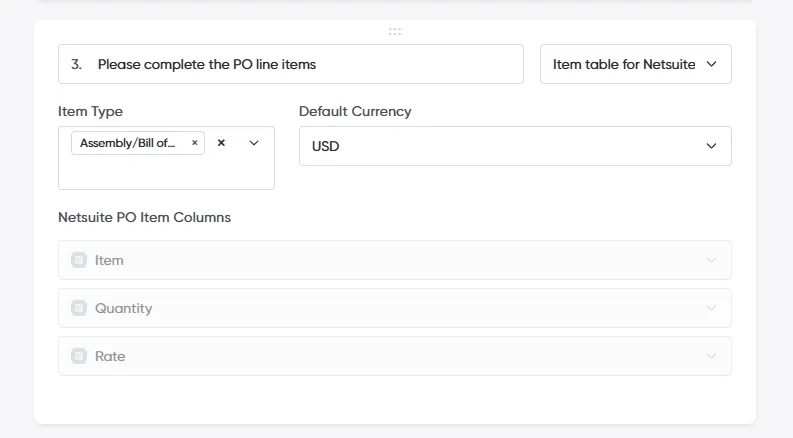
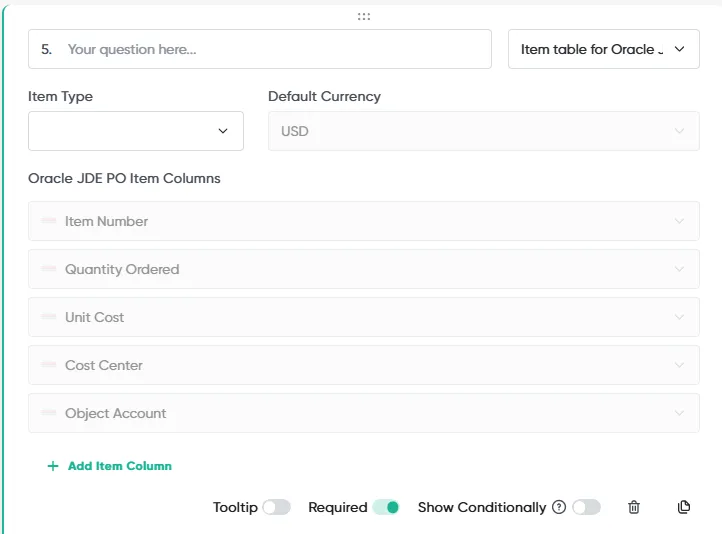
Line items: come from the ERP item table question on the request (see Configuring the Item Table).
5.11.2 Following a Purchase Order
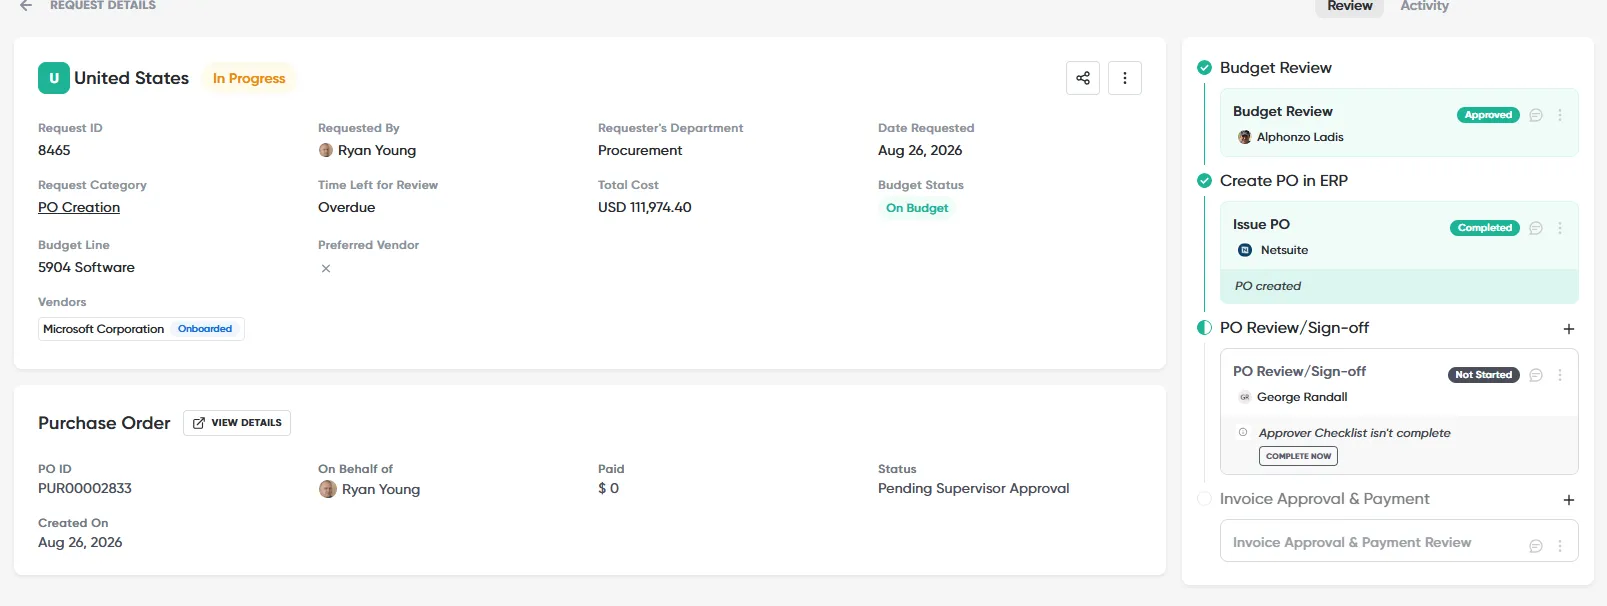
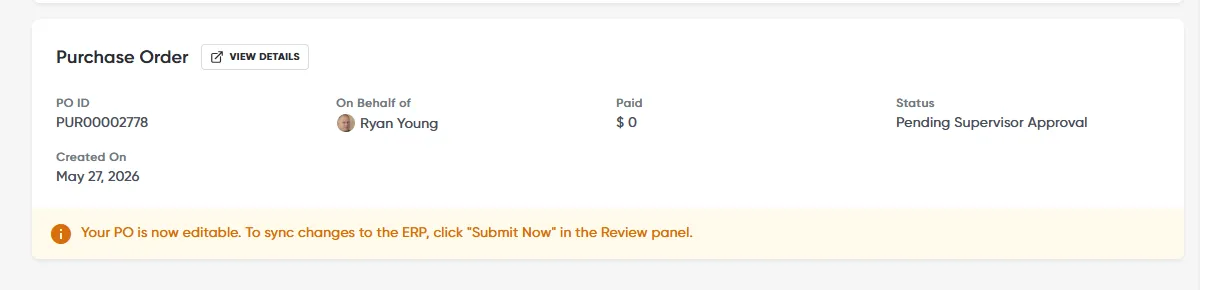
Once the PO exists, a Purchase Order card appears on the request with:
- PO ID, On Behalf of, Paid and Created On
- Status: the status from your ERP, including who it is waiting on where the ERP has its own approvals
Click VIEW DETAILS to open the PO in your ERP.
Other places POs appear:
-
Review timeline: the PO step’s ⋮ menu has Details (status, created and last-updated dates) and Open in ERP.
-
Requests list: has PO ID and PO Status columns, and you can filter by PO Status.
-
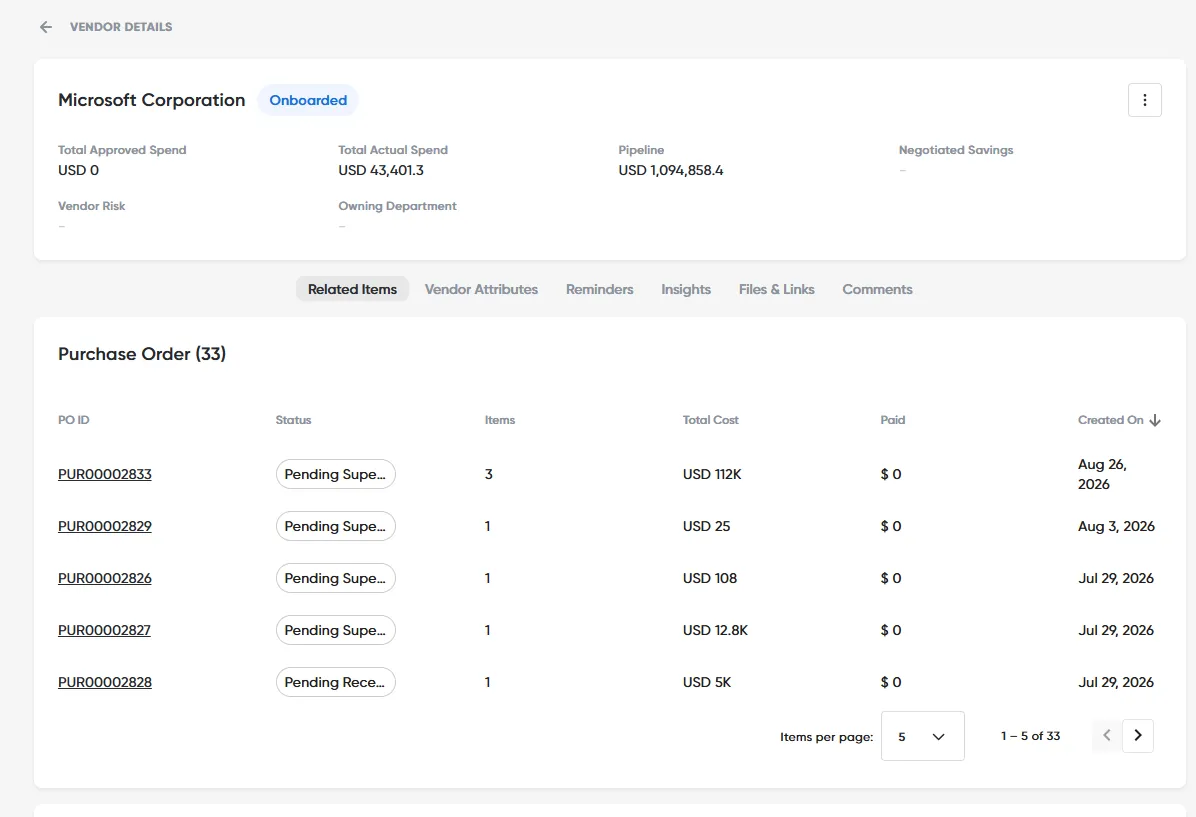
Vendor page: lists every PO for that vendor, with items, total cost, amount paid and status.
5.11.3 Editing a Purchase Order (NetSuite)
For NetSuite purchase orders, an Admin can change an approved request’s PO:
-
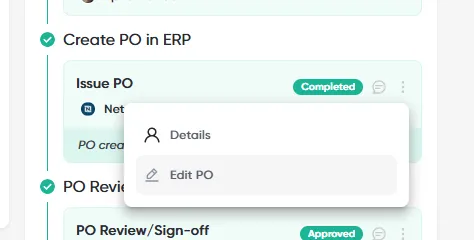
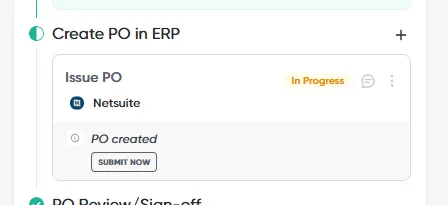
In the review timeline, open the PO step’s ⋮ menu and choose Edit PO.
-
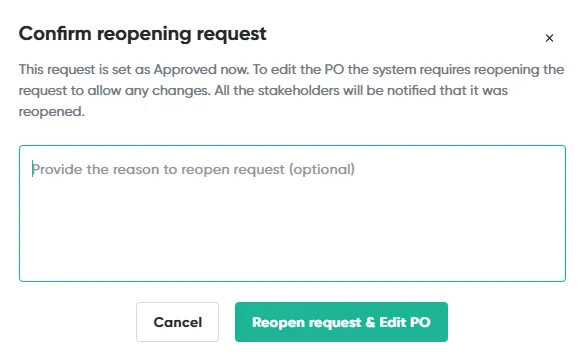
Optionally enter a reason, then click Reopen request & Edit PO. Everyone involved in the request is notified.
-
Update the request’s answers. The PO card shows that the PO is editable.
-
Click SUBMIT NOW on the PO step to send the changes to NetSuite.
5.11.4 Buying from Coupa Catalogs and Punchout Stores
With Coupa connected, requesters can add items from your Coupa hosted catalogs and from suppliers’ punchout stores, instead of typing every line.
Admin setup: add the Coupa Items and Catalog Selector question to the request type. Under Allow purchasing from:, choose one or more of:
- Hosted Catalogs
- Punchouts (Stores)
- Non-catalog items (custom)
Adding catalog items (requesters):
- Below the item table, click Add from catalog.
- Pick a catalog, or click Search Items on Catalog to search all of them.
- Set the quantity and click ADD TO REQUEST. You can keep adding items without closing the window.
- Click an item’s name to see its details and files before adding it.
Shopping a punchout store (requesters):
- Click Add from a Store and choose a store. It opens in a new tab through Coupa.
- Shop on the supplier’s site and check out to your Coupa cart.
- Come back to the request in Opstream and click Sync items. Your cart items are added to the item table.
Good to know:
- Sync after checkout. Items don’t come across from the store on their own; click Sync items after checking out.
- Deleted rows come back. Removing a synced item in Opstream doesn’t remove it from your Coupa cart, so it returns at the next sync. Remove it in Coupa too.
- Your stores and catalogs. You only see the stores and catalogs your Coupa account has access to. Your Opstream email must match your Coupa user.
- Hosted catalogs are an add-on. Browsing them is enabled per organization.
- Coupa-side panel. Your Coupa admin can install an Opstream panel on Coupa’s cart page that shows whether the cart has been synced.
- Typing your own items. Choose Create your item to add something that isn’t in a catalog, if your admin allows non-catalog items.
5.11.5 Sending Payments to Your ERP (NetSuite)
| What it does | Creates the vendor payment in NetSuite for an approved invoice, and shows its status in Opstream |
|---|---|
| License | Add-on, enabled per organization. Also needs the Invoices add-on (section 5.9). |
| Who | Admins and Approvers |
Admin setup:
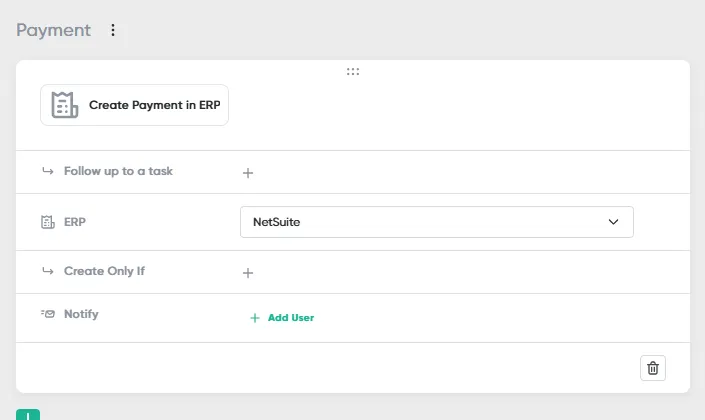
- On the Invoice request type, add a Create Invoice in ERP step, followed by a Create Payment in ERP step with ERP set to NetSuite.
- Map the payment fields on the request type’s Automation tab, under Payment.
On the request: a Payment card shows the NetSuite Status, Due Date and amount Paid.
- Click SEND FOR PAYMENT to send the payment to NetSuite. A banner confirms it is being processed and then shows whether it succeeded.
- The button is hidden once the payment is approved or executing, or the invoice is paid in full.
- Click VIEW DETAILS to open the payment in NetSuite.
The Invoices list also shows a Payment Status column you can filter on.
This site uses anonymous analytics to work out which pages are useful. Visits are not tied to anyone, and nothing you type is recorded. See the Opstream privacy policy.