

4.1 Requester Guide: Submitting and Tracking Requests
The Requester role focuses primarily on initiating processes and maintaining visibility into their submitted items.
Requesters: this section covers everything for your daily work. You do not need Sections 3, 5, 6, or 7.
4.1.1 What Requesters Can Do
-
Submit new requests
-
Track the status of their requests
-
View relevant vendor and software information
-
Upload documents and provide additional details when requested
4.1.2 Submitting a New Request
To kick off any workflow, such as purchasing software, reviewing a contract, or initiating a security assessment, you use the Create Request button.

-
Select the Request Type: You will choose the appropriate Request Type for your needs (e.g., Software, Hardware, Services, or Legal question).
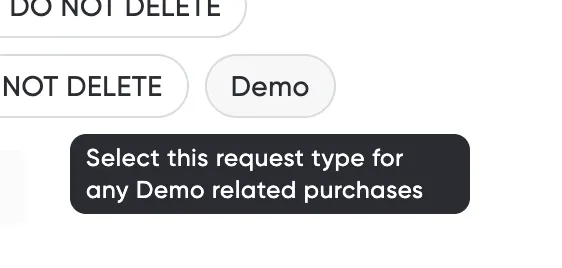
If your Admin has added a tooltip to a Request Type, hovering over it shows a short description of what that Request Type is for.
-
Fill out the Form: Answer the questions configured by your Admin, which may use conditional logic to ensure you only see relevant fields.
-
Review and Submit: You can save an incomplete request to return to later, preventing loss of progress. Once ready, click Submit to send the request into the defined approval workflow.

4.1.3 Preventing Duplicate Software Purchases
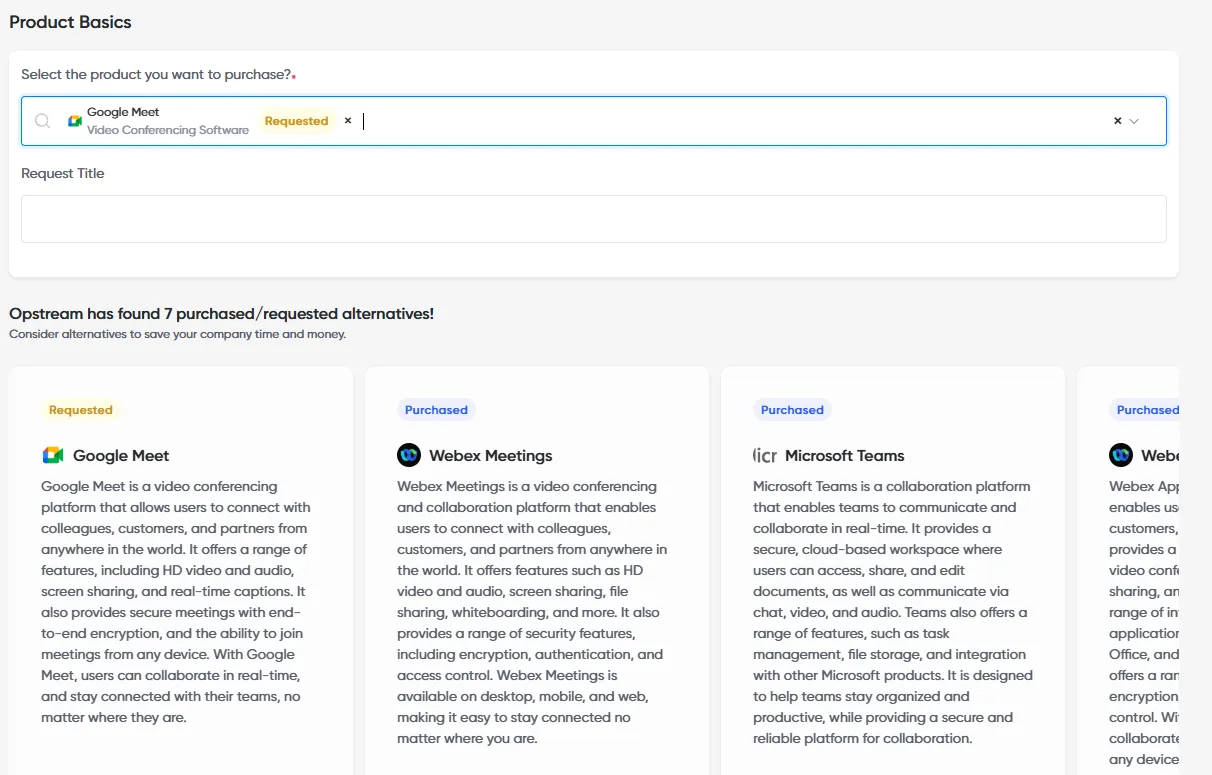
When you select a product during a software request submission, Duplication Prevention immediately checks against existing tools.
-
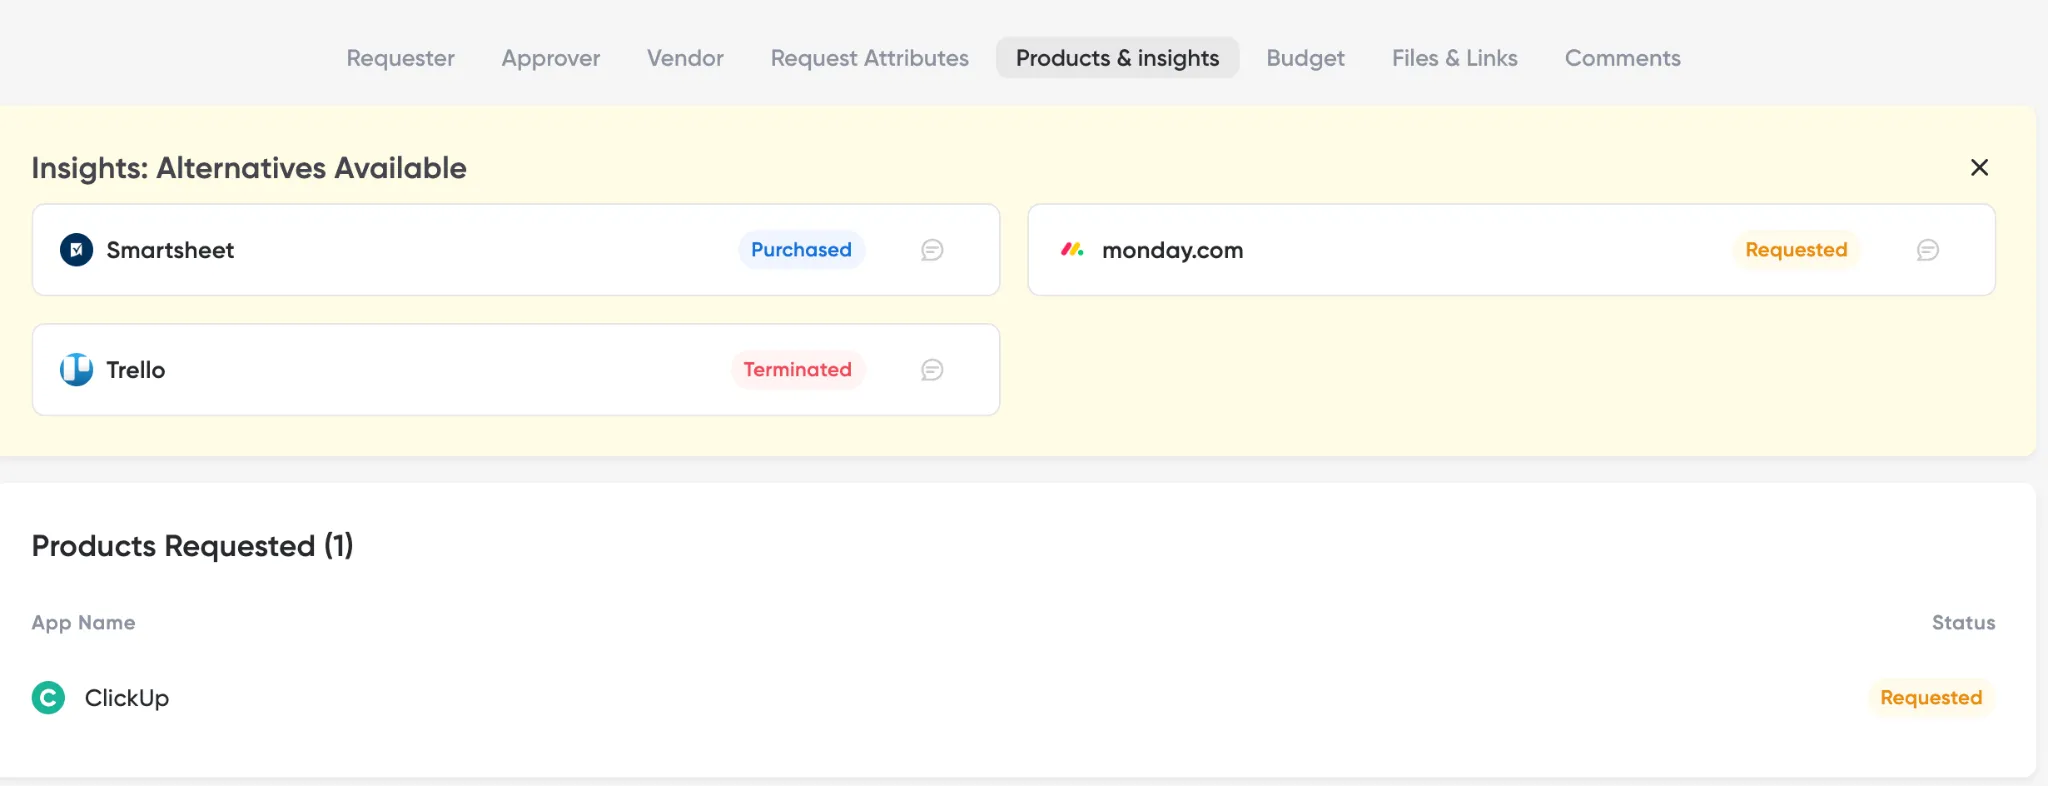
Alternatives Display: Opstream surfaces alternative solutions with similar functionality.
-
Status Indicators: You will see the status of these alternatives (e.g., Purchased, Not Purchased, or Requested) to guide you toward existing, approved tools. This process reduces waste and increases software adoption.
4.1.4 Tracking Your Requests

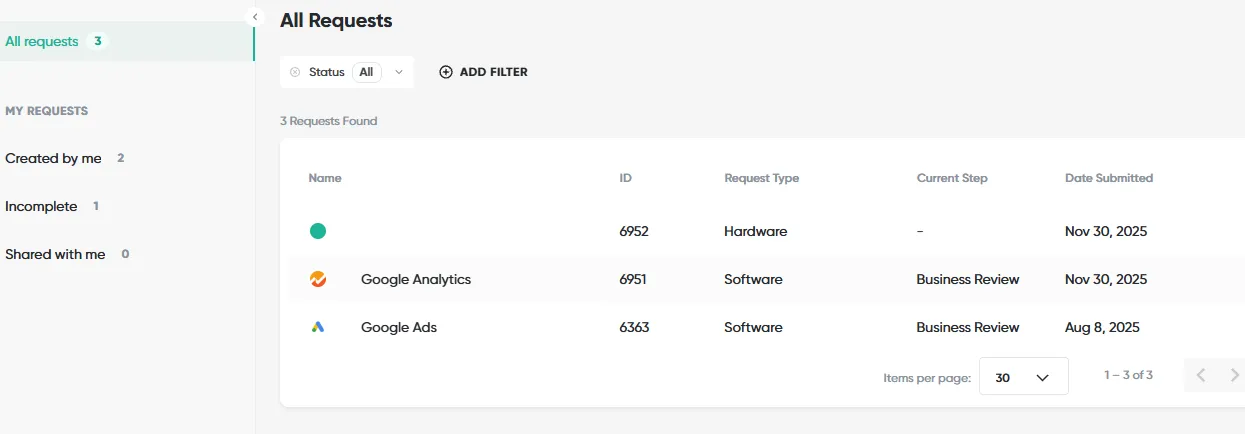
After submission, you can monitor the status of your requests from the Requests menu. Key sections:
-
Created by Me: This section shows all requests you personally submitted.
-
Incomplete: This section holds forms you started but did not submit.
-
To Submit: Requests created for you (for example by an automated reminder) that you still need to complete and submit. This section only appears when there is something in it.
-
Shared With Me: Once your teammate shares a request with you it will be shown here.
-
Request Status: You can view the status of your request (e.g., In Progress,
-
Approved, Rejected) and see the approval flow to determine which stakeholder is currently assigned.
You can also use several tools to manage and find your requests efficiently:
-
Filters: Narrow the requests list using attributes such as department, request type, or value. Multiple filters can be applied at once.
-
Inbox & Notifications: The speech-bubble Inbox icon in the top-right corner lists the comment threads you are part of. The bell icon shows date reminders and requests created on your behalf. Updates on your requests (approvals, rejections, new comments) arrive by email, and in Slack or Microsoft Teams if you have connected them. See Notifications and Collaboration.
-
Global Search: Use the magnifying glass icon in the top-right corner to search across all records in Opstream – vendors, software, requests, and documents – by name or ID. Search results are filtered by your user role, so you only see records you have access to.

-
Duplicate Request: Open the three-dot (⋮) menu on a request row and select Duplicate Request to start a new request of the same Request Type, with the requester fields pre-filled from the original where possible. Review the pre-filled answers and submit like any new request.
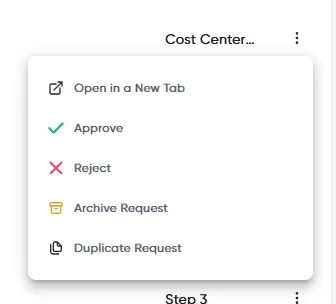
- Other row actions: The same three-dot (⋮) menu also has Open in a New Tab and Archive Request. If you’re also an approver on the request’s current step, Approve and Reject appear here too, so you can act on it without opening the request.
4.1.5 Working with Request Details
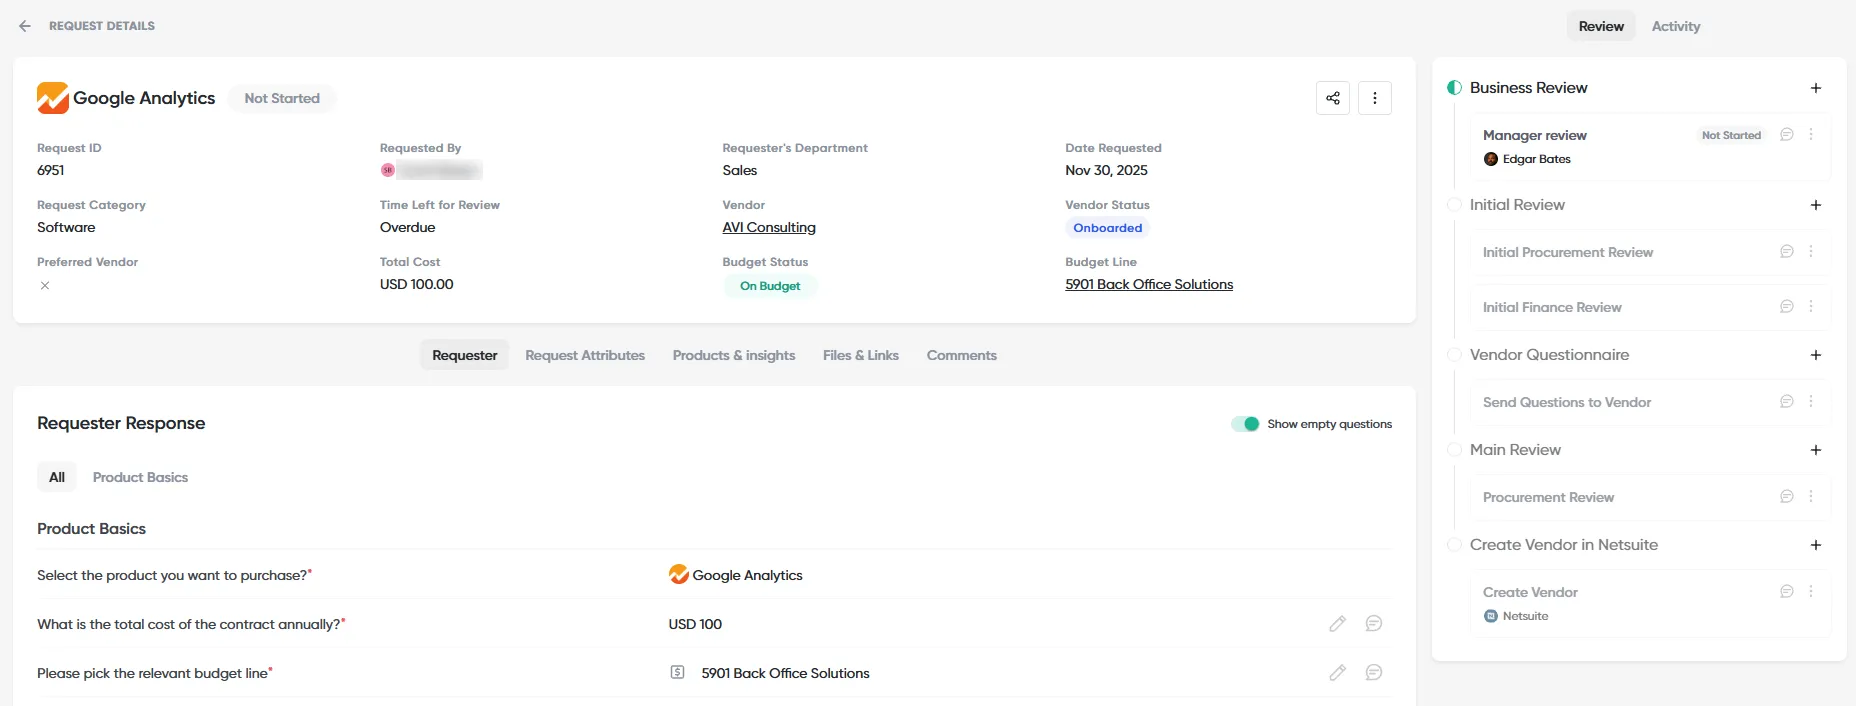
From the Request Details page, requesters can:
-
View submitted answers
-
Upload additional files (Files & Links tab)
-
Add comments – use the Comments section for general notes, or the 💬 icon next to a specific answer to leave a contextual comment on that field
-
Respond to follow-up questions (if requested)
-
Review the Activity log – a full record of every action taken on the request since its creation, including status changes, approvals, reassignments, and notifications
-
Monitor progress through the approval flow
-
Share the request with users from other departments using the Share button to give them visibility into a specific request
Requesters cannot:
-
Modify approval steps
-
Assign approvers
-
Change workflow logic
The Request Header
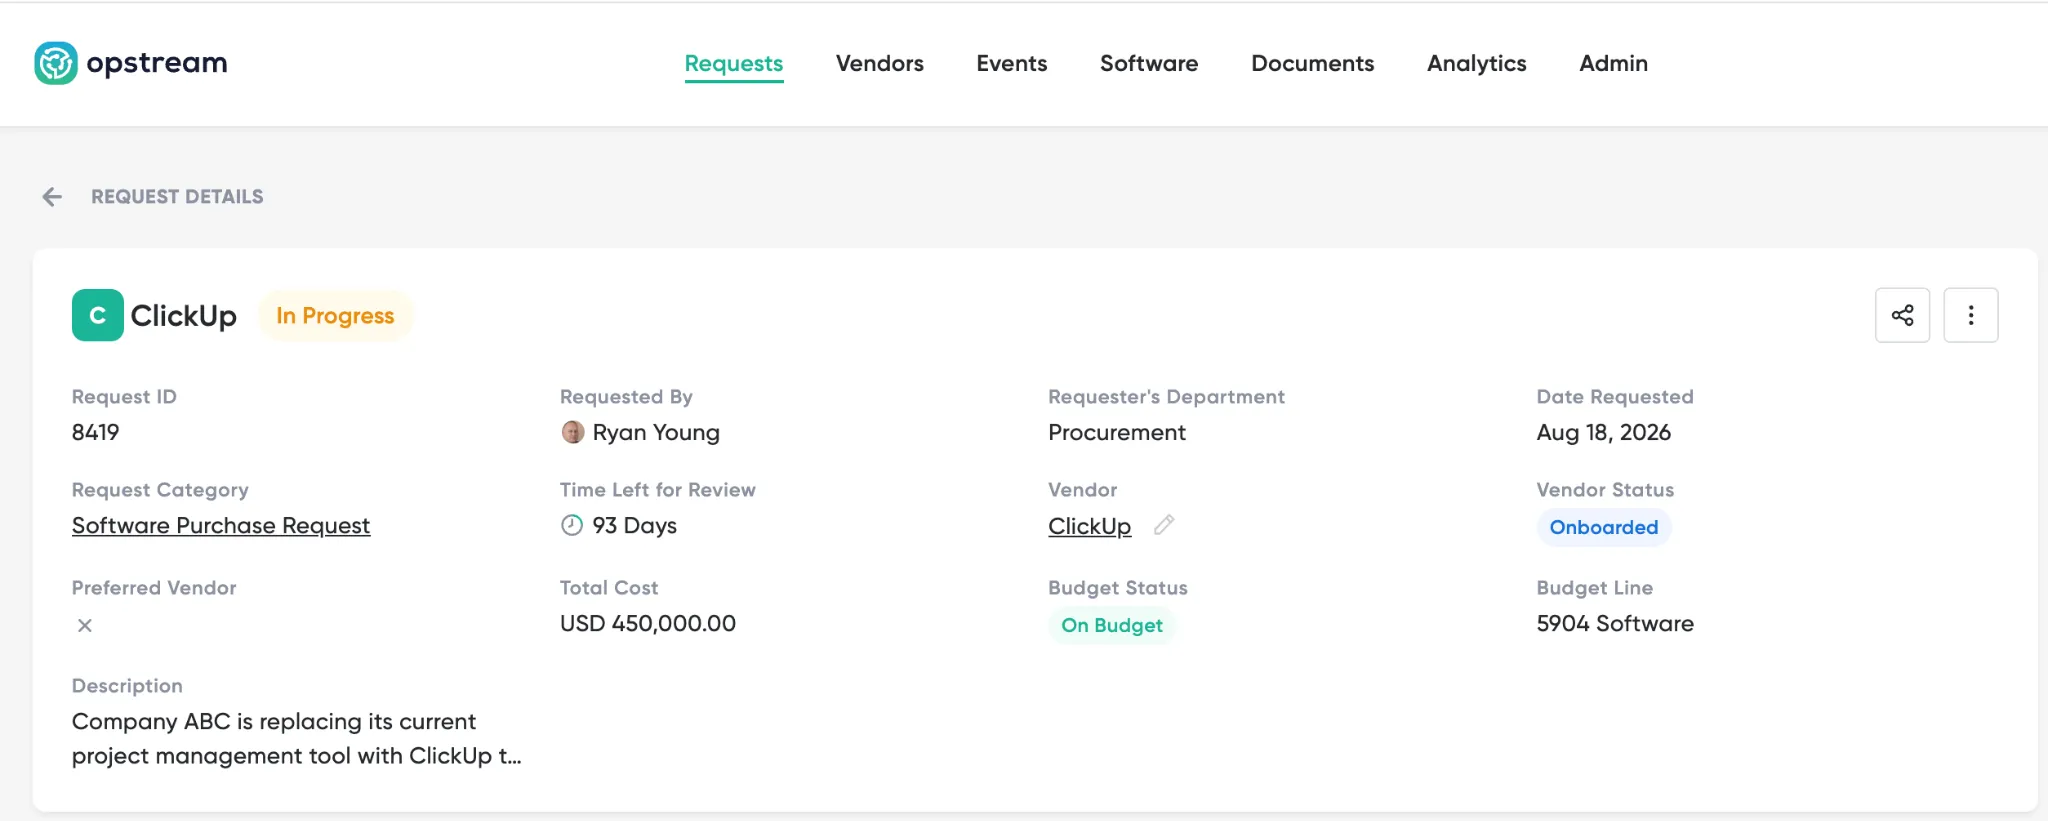
- Every request detail page opens with a header showing key metadata. Key fields include: Request ID (unique identifier), Requested By, Requester’s Department, Date Requested, Request Category (intake schema used), Time Left for Review (turns red when overdue), Vendor (links to the Vendor record), Vendor Status (In Progress / Onboarded / Offboarded), Budget Status (On Budget or Over Budget), and Budget Line (cost center charged). The status badge – Approved, In Progress, Rejected – appears next to the title, and a banner confirms the outcome when the request is fully decided.
More Actions Menu
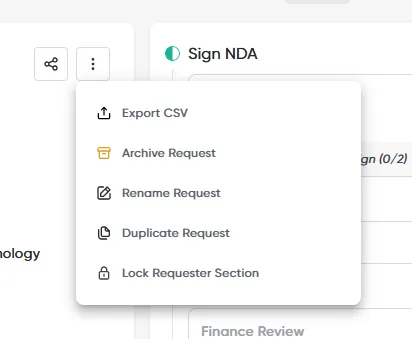
- The three-dot menu in the request header provides additional workflow actions. Click it to access:
Export CSV – downloads the request’s data as a CSV file.
Archive Request – moves the request out of the active list without deleting it.
Rename Request – lets you change the request’s display title.
Duplicate Request – starts a new request of the same Request Type, with the requester fields pre-filled from this request where possible. Use it to save time on similar, repeat purchases instead of re-entering the same information.
Lock Requester Section / Unlock Requester Section – prevents or re-enables the requester from editing their answers after submission. Use Lock once approvers have started reviewing so the form cannot change under them. The label toggles based on current state.
Budget Tab
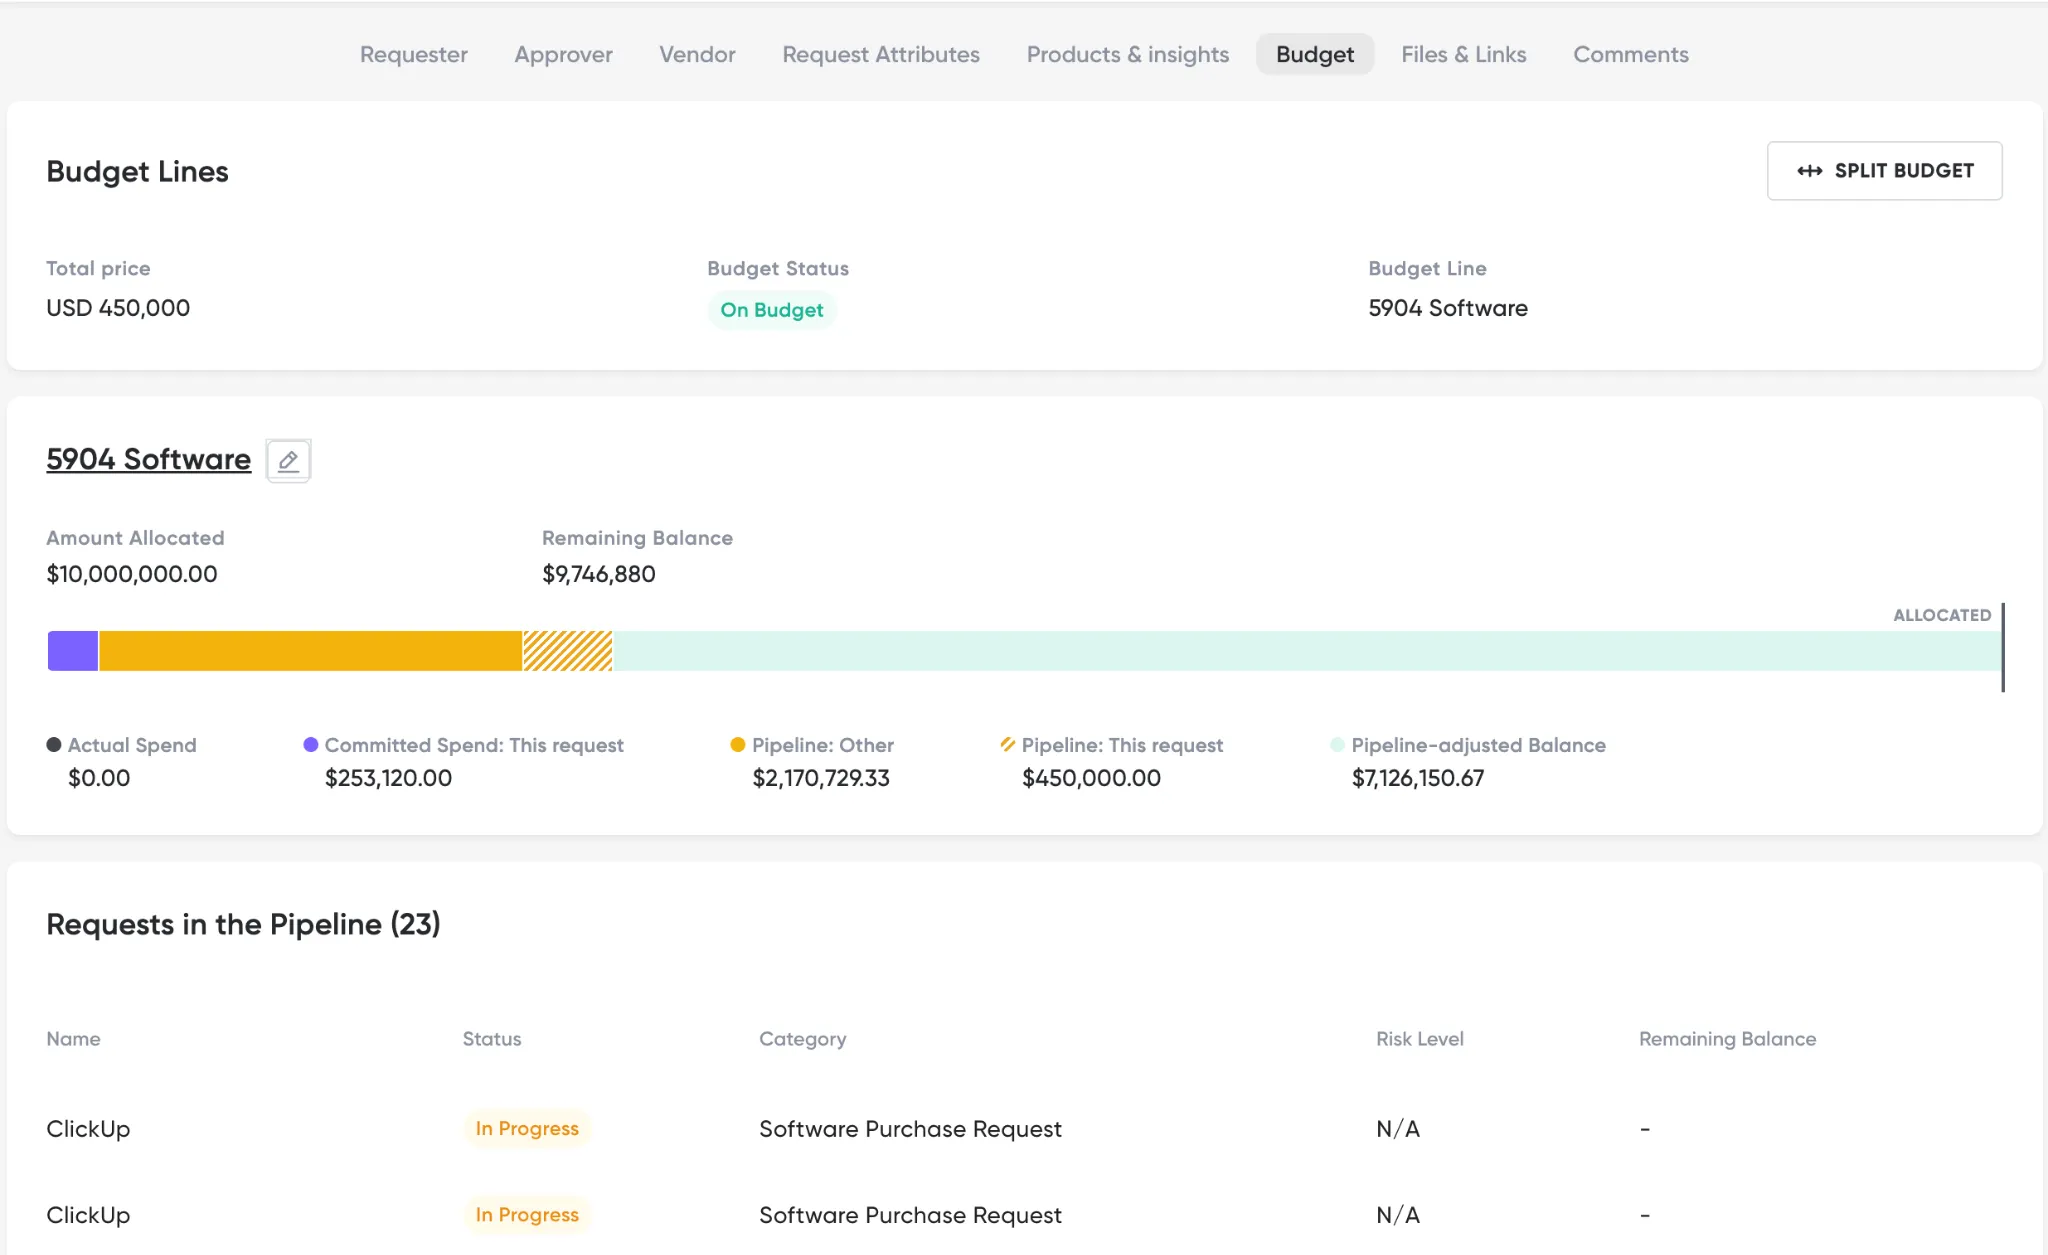
The Budget tab shows every budget line associated with this request and the current spending picture. Each line card shows Budget Amount (total available), Requested (amount asked for), Approved (approved so far), Remaining Amount, and a colour-coded progress bar (green = on budget, yellow/red = approaching or over limit). Use Add Budget Line to associate an additional cost center, or Add Split Budget to divide the cost across multiple lines.
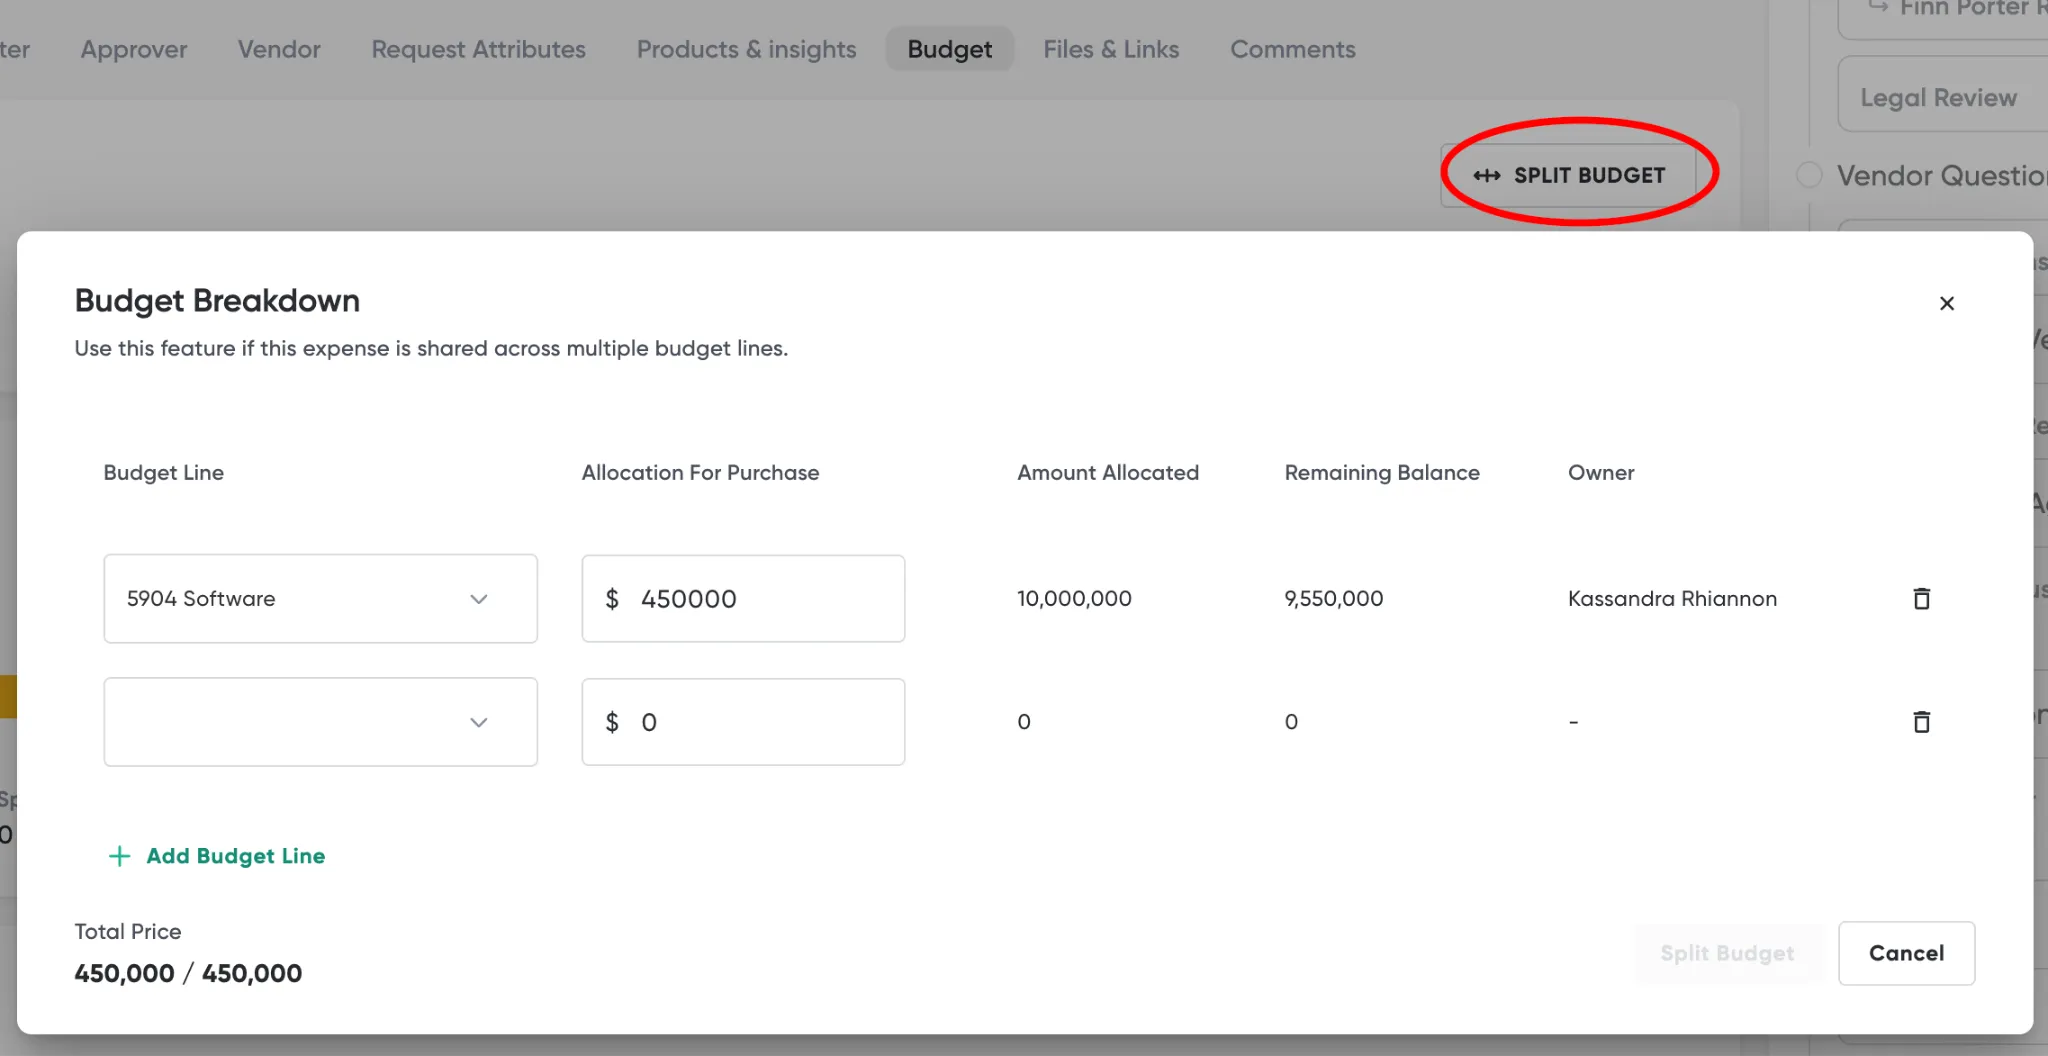
Splitting a Budget
When a request spans multiple cost centers, use Add Split Budget on the Budget tab. In the Budget Breakdown dialog, enter the Allocation for Purchase amount for each budget line. The dialog shows the Finance Manager responsible for each line and the Remaining Amount before this allocation. Add additional lines with Add Budget Line, then click Save Budget. Note: changes to the split may require manager approval.
Products & Insights Tab
The Products & Insights tab surfaces AI-powered purchasing intelligence. Insights – Alternatives Available lists tools your organisation already uses that could substitute the requested product – helping reviewers avoid duplicate purchases. Each alternative shows the product name, its current status in your software inventory, and a link to view details. Products Requested lists the specific products or SKUs in this request, with links to their Vendor and Software records.
Vendor Tab
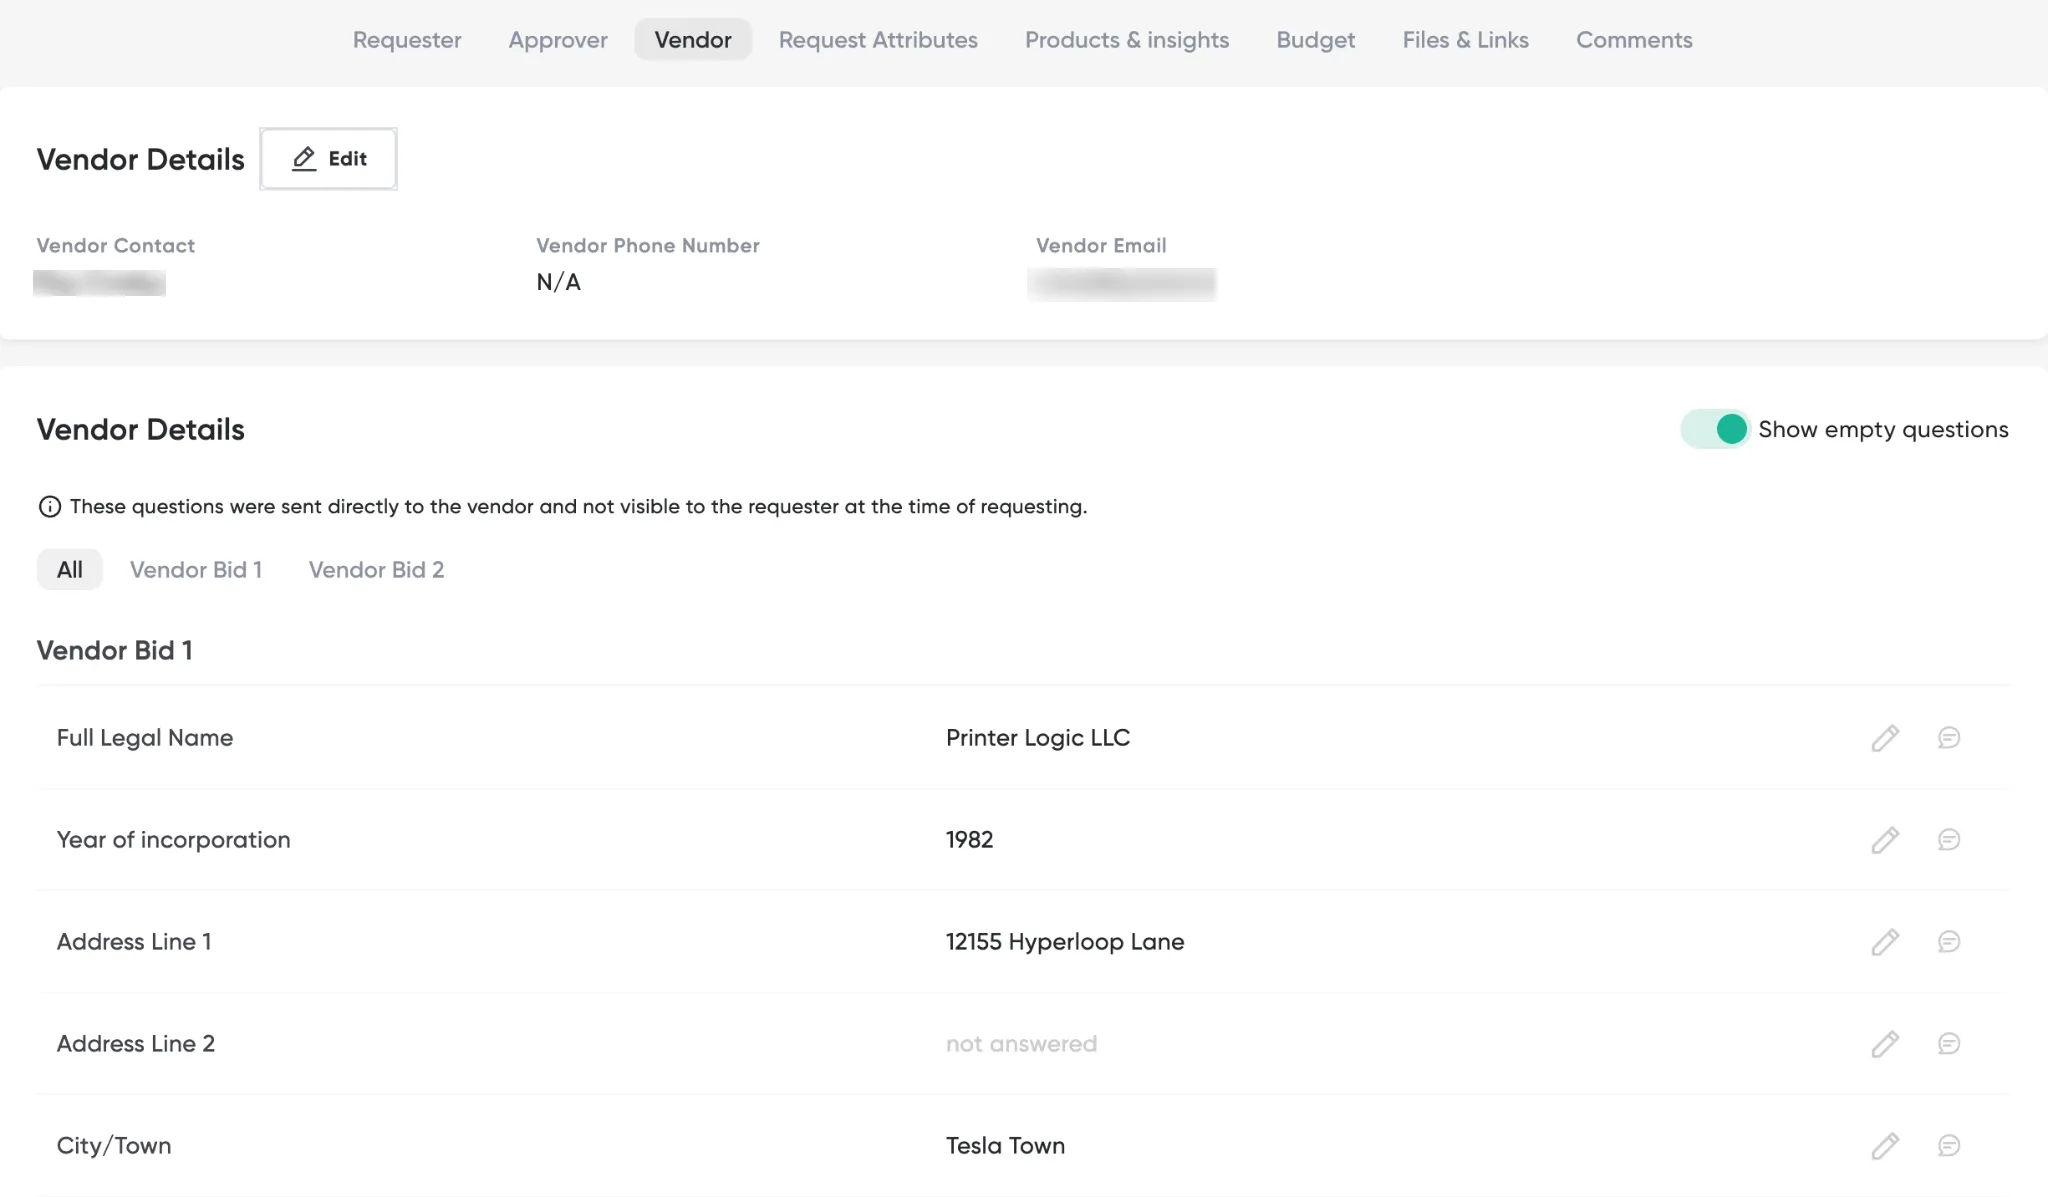
The Vendor tab shows the vendor questionnaire – questions sent to the vendor for due diligence and their responses. The header shows the vendor name, current status (In Progress / Onboarded / Offboarded), and Edit / Add buttons to update vendor details or associate a different vendor. The Vendor Details section lists each question submitted and any answer received – for example, NDA signed status or certifications held.
Purchase Order Card
Once a request is approved, Finance can create a Purchase Order from within the request. The PO card appears in the right-hand panel below the Review steps and shows the PO number, Date issued, and Status (e.g., Pending Supervisor Approval, Approved). The card also displays the sequential financial workflow steps – Invoice, then Payment – so every participant can see the full procurement lifecycle at a glance.

Invoice Card and Payment
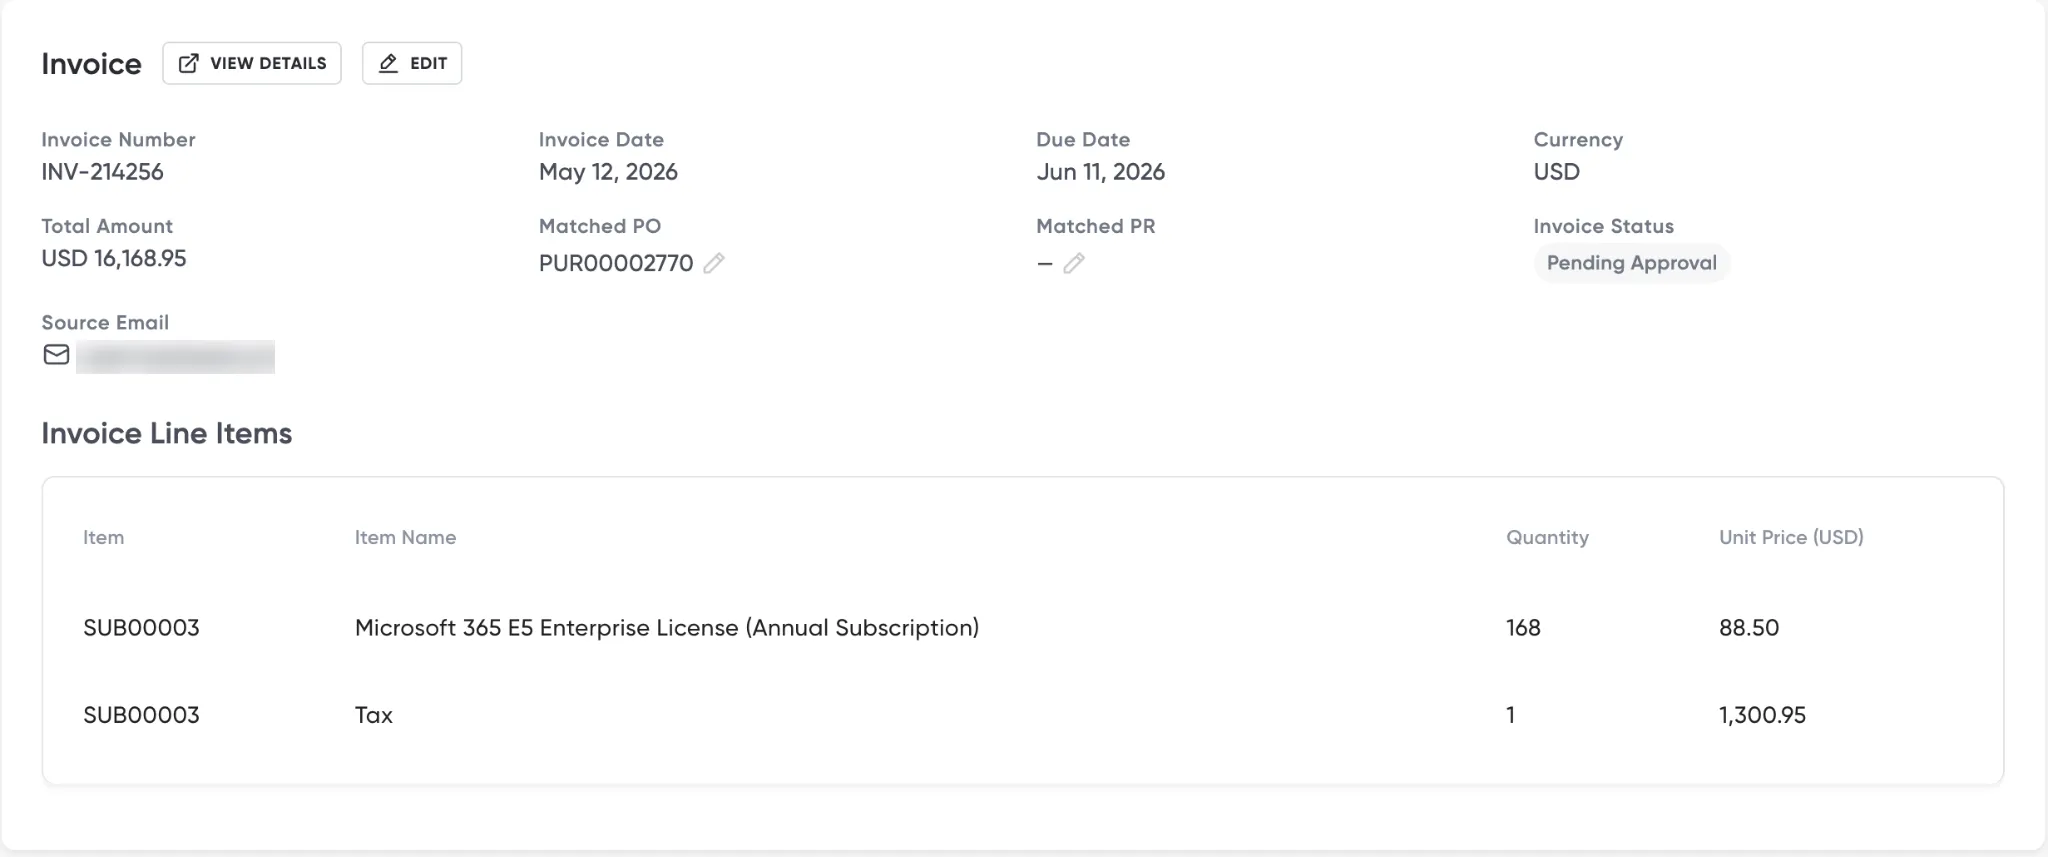
After a PO is issued, Finance attaches the vendor invoice. The Invoice card shows the Invoice Number, Issue Date, Due Date, Amount, and Invoice Status (e.g., Pending Supervisor Approval). An Invoice Line Items table lists each item with its description, Quantity, Rate, and Item Total Cost. Below the Invoice card, the Payment section shows Payee, Start Date, End Date, and Total. Use Send for Payment (or Record Payment for manual recording) to push the payment to your connected ERP or payment system.
This is for attaching an invoice to an existing PO-based request. If your organization has the Invoice Reconciliation add-on enabled, invoices instead arrive by email or upload as their own dedicated Invoice requests.
Files & Links Tab
The Files & Links tab is a document shelf attached to this specific request. It holds files and URLs uploaded by any participant – contracts, invoices, supporting documents, or reference links. Each row shows File name (clickable to open/download), Type (e.g., Invoice, Contract), Date uploaded, Created By, and action buttons. Use Upload file / link to add new items. Files uploaded here also appear in the central Documents library tagged to this request.
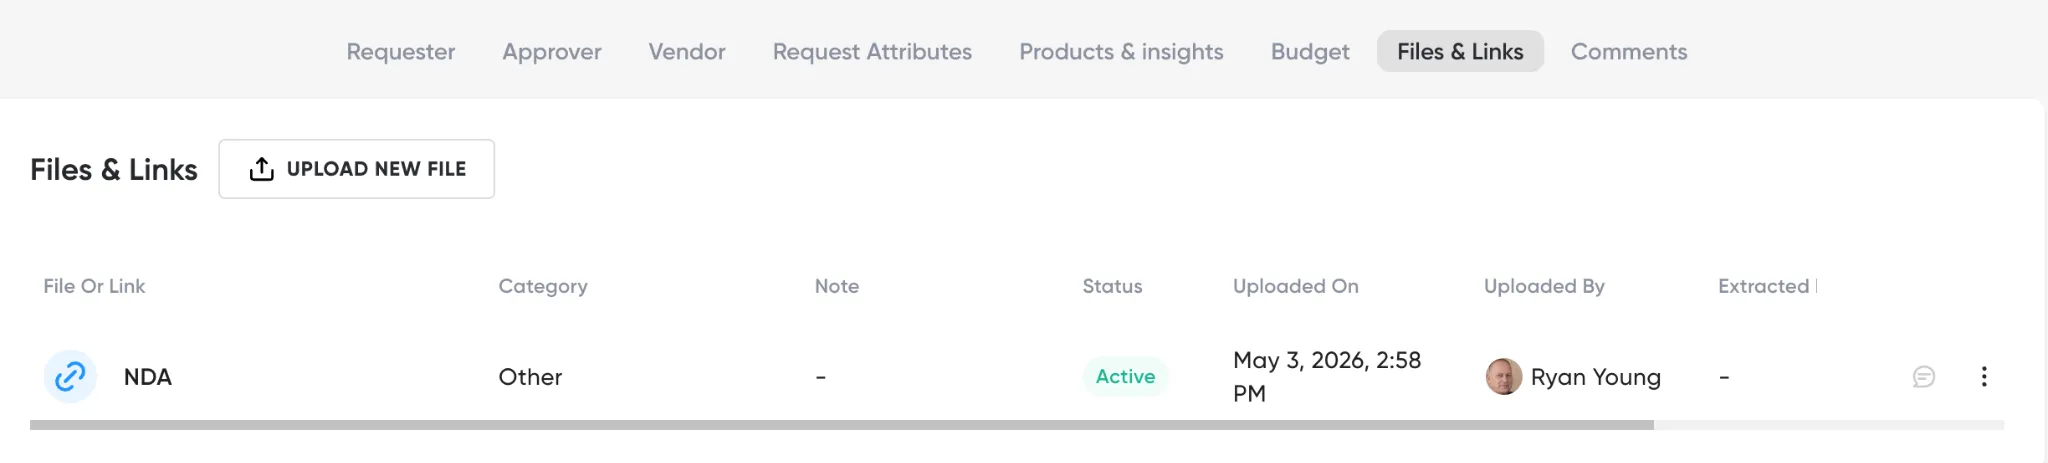
Filtering, Sorting, and Columns
The Files & Links tab uses the same filterable, sortable table as the central Documents menu – just with fewer columns shown by default.
-
Filters combine (AND) and show as removable chips; use Clear Filters to reset them.
-
Click a column header to sort by that column.
-
Use the column picker to bring in any column from the full Documents column set beyond the default view.
-
An empty result shows “no files match these filters,” distinct from a tab with no files at all.
-
Filters are scoped to the record you’re viewing – they don’t carry over when you open a different vendor, software, or request.
This works the same way on every Files & Links tab – vendor records, software records, and request details.
Renaming Files and Links
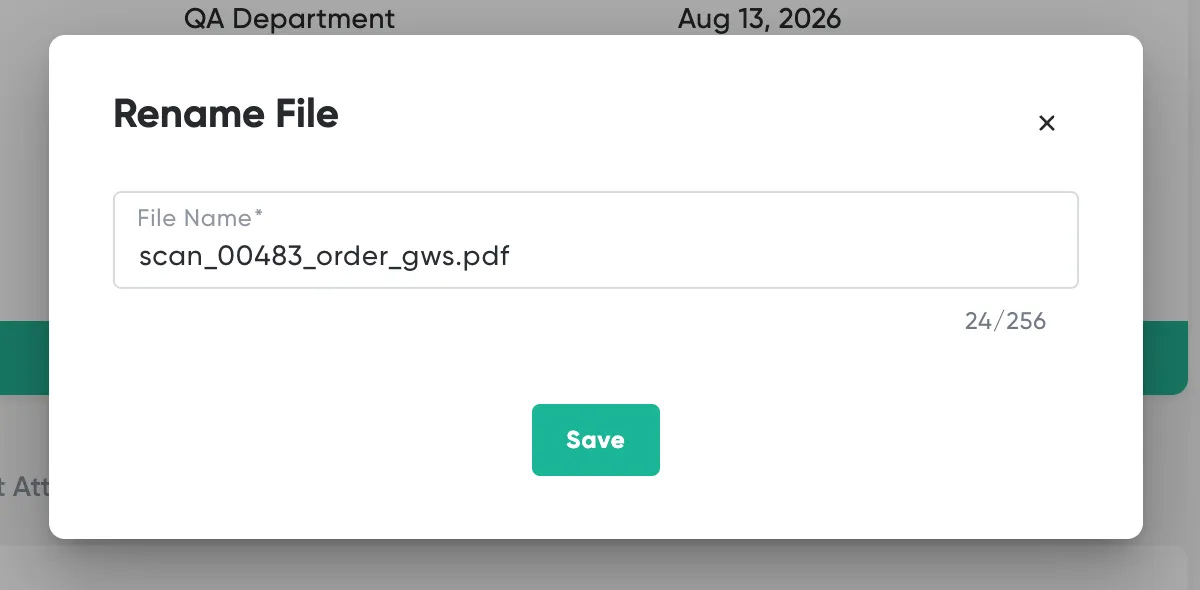
If a file or link arrives with an unreadable name (e.g., an auto-generated scan name), you can give it a meaningful display name so it’s easy to recognize and find in search. Open the three-dot (⋮) menu on the file’s row and select Rename. The option is available to the user who uploaded the file or link, and to Admins.
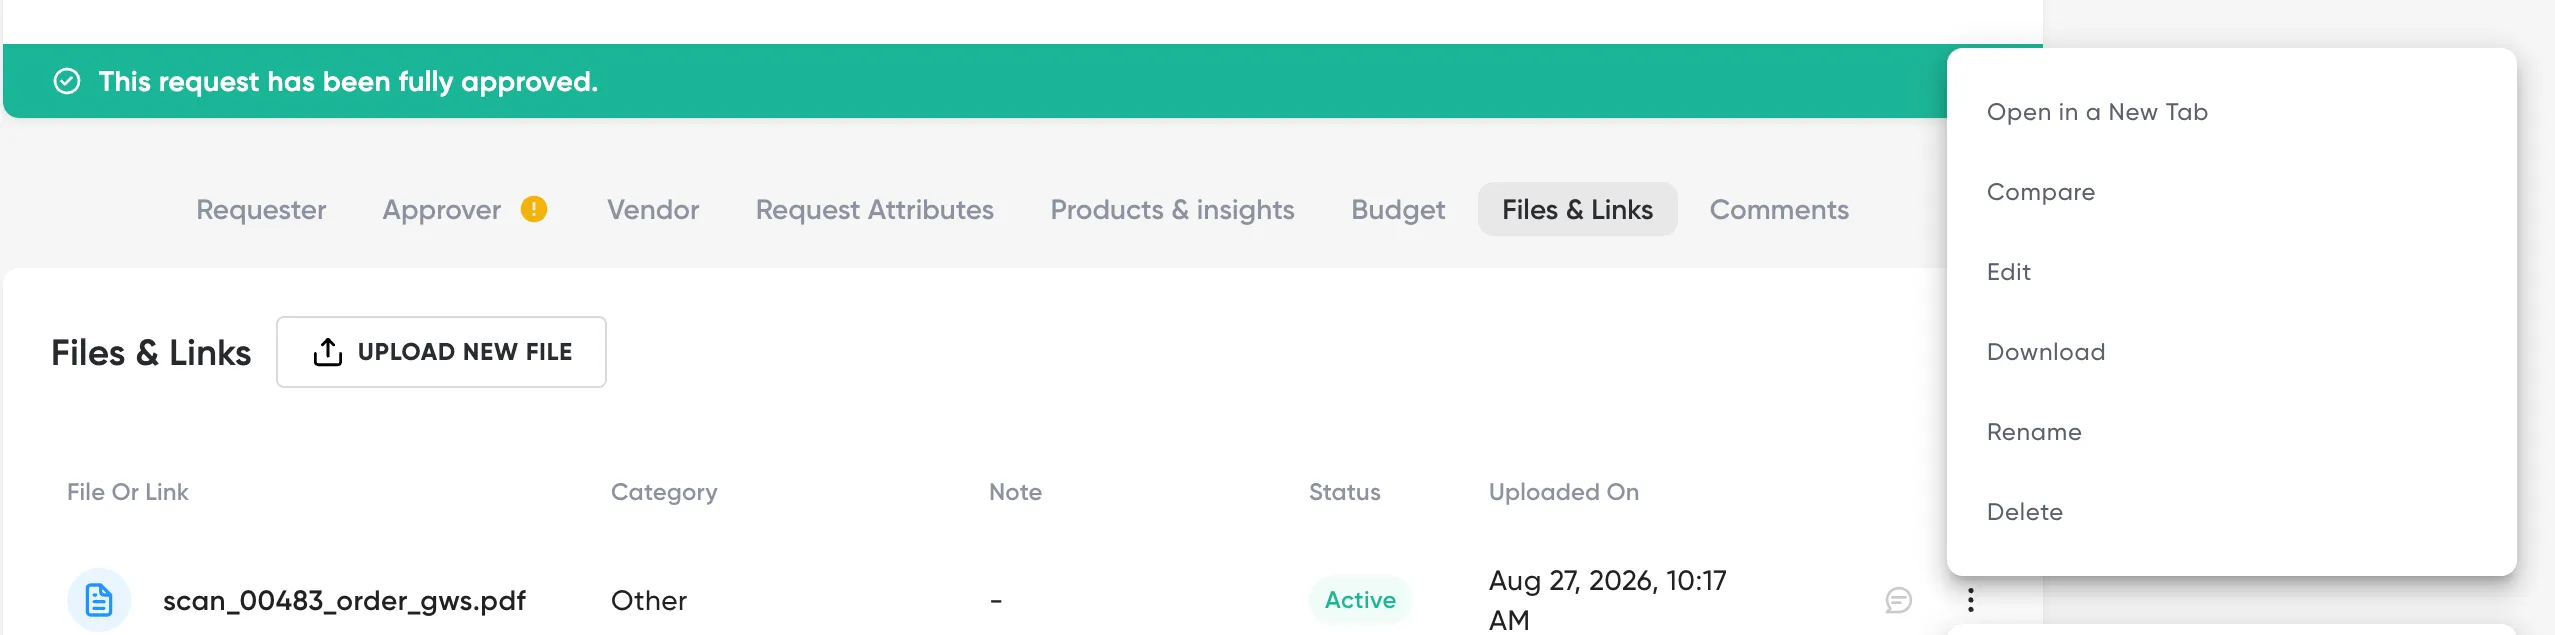
In the dialog, edit the name and click Save. Renaming changes only the display name shown in Opstream – the underlying file and the URL of a link stay unchanged. The new name also appears in the central Documents library. The same option is available on the Files & Links tabs of vendor and software records and in the Documents library.
4.1.6 Best Practices
-
Provide complete and accurate information up front to avoid delays.
-
Attach documents early (quotes, contracts, compliance files).
-
Review suggested alternatives before submitting a software request.
-
Use comments to clarify context instead of submitting duplicate requests.
-
Use Duplicate Request for recurring or similar requests instead of filling out the form from scratch each time.
This site uses anonymous analytics to work out which pages are useful. Visits are not tied to anyone, and nothing you type is recorded. See the Opstream privacy policy.