

5.8 Deep Dive: Integrations (Setup & Management)
5.8.1 The Integrations Catalog
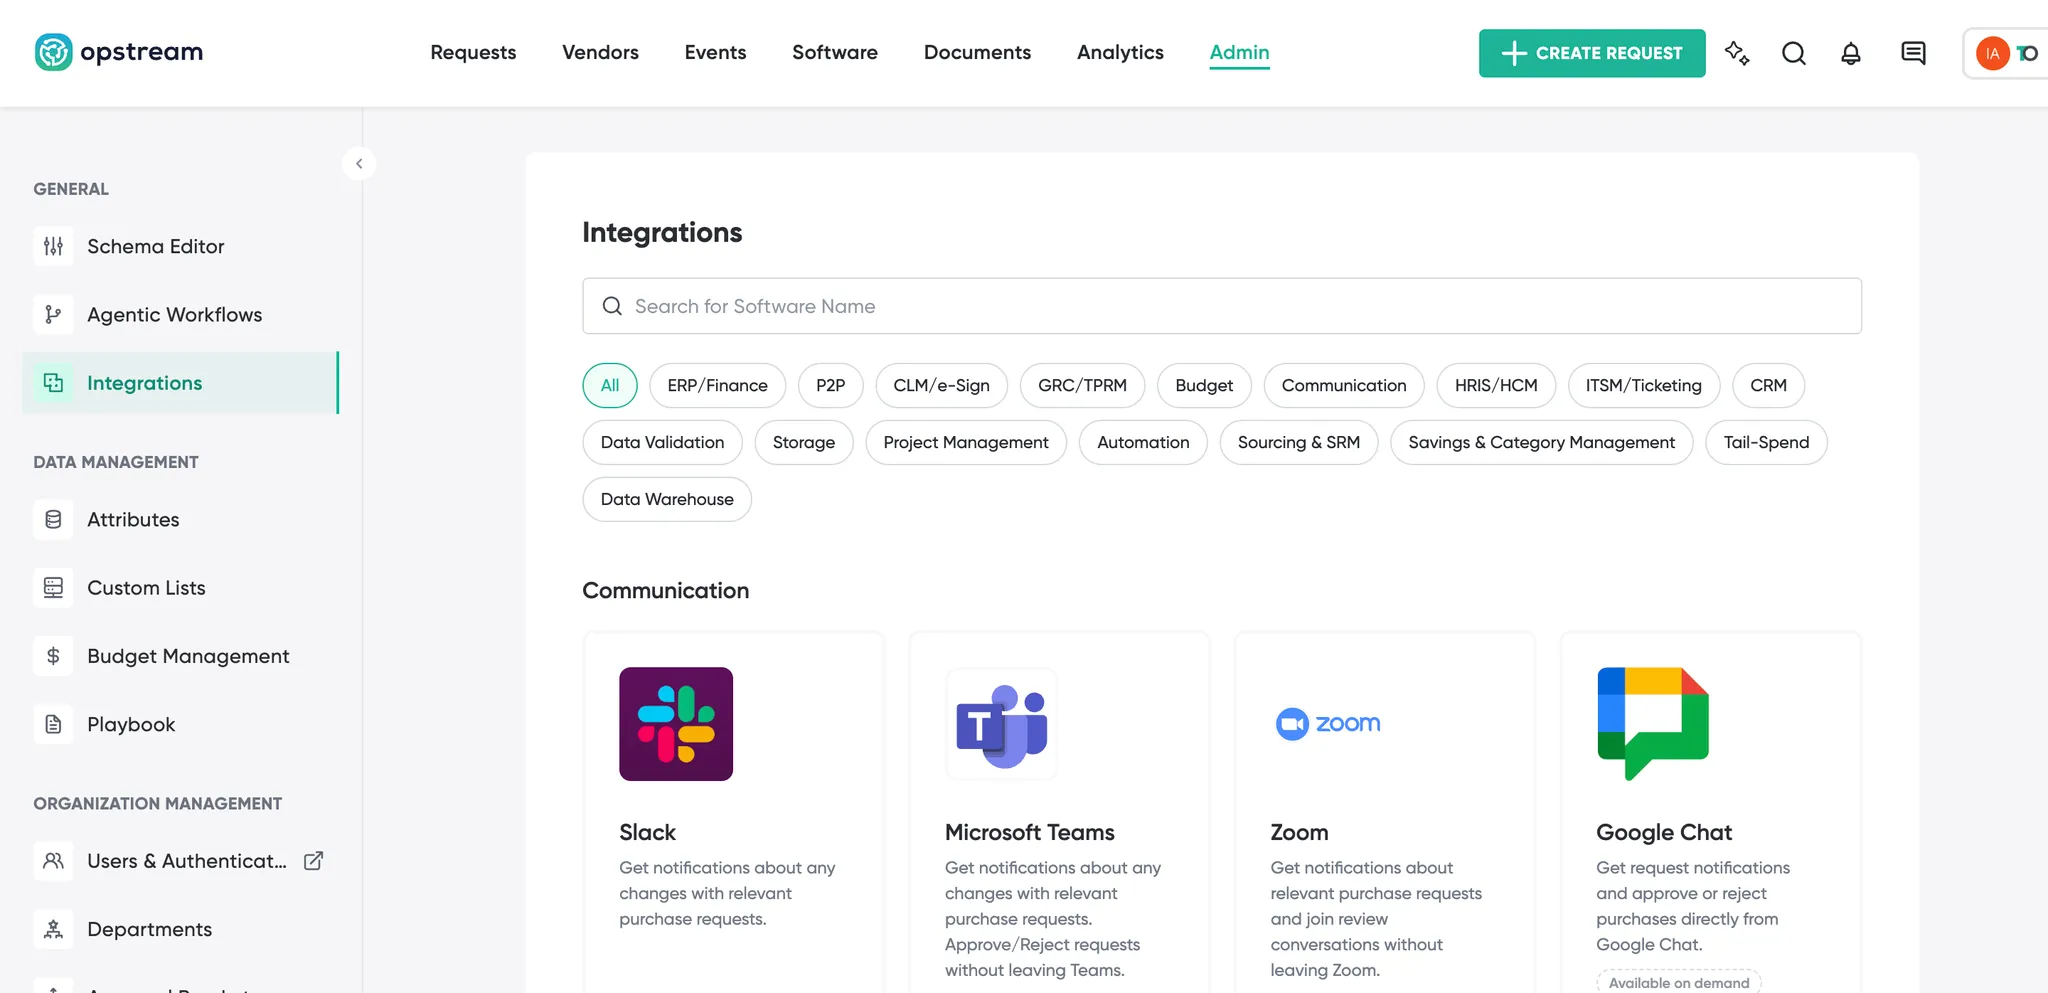
Admin → Integrations shows the connector catalog, grouped into categories such as ERP/Finance, CLM/e-Sign, HRIS/HCM and GRC/TPRM. Each connector is a tile showing its logo, its name and a short description of what the connection does, with a green check on the logo when it is connected and a red warning icon when it is connected but erroring. Use the search box to find a connector by name, or the category chips to narrow the page to one category. Click a tile to open its detail page.
Connectors that Opstream enables for you rather than you configuring them yourself are marked “Available on demand”. Hover one to see how to request it, or email Integrations@opstream.ai.
5.8.2 Connecting an Integration
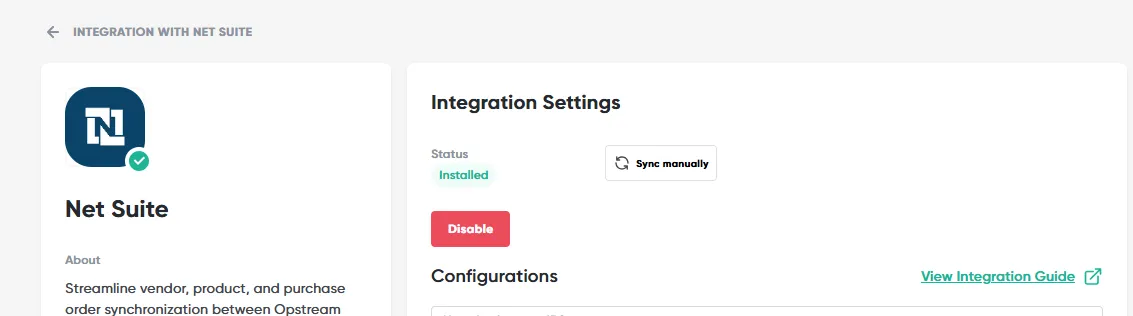
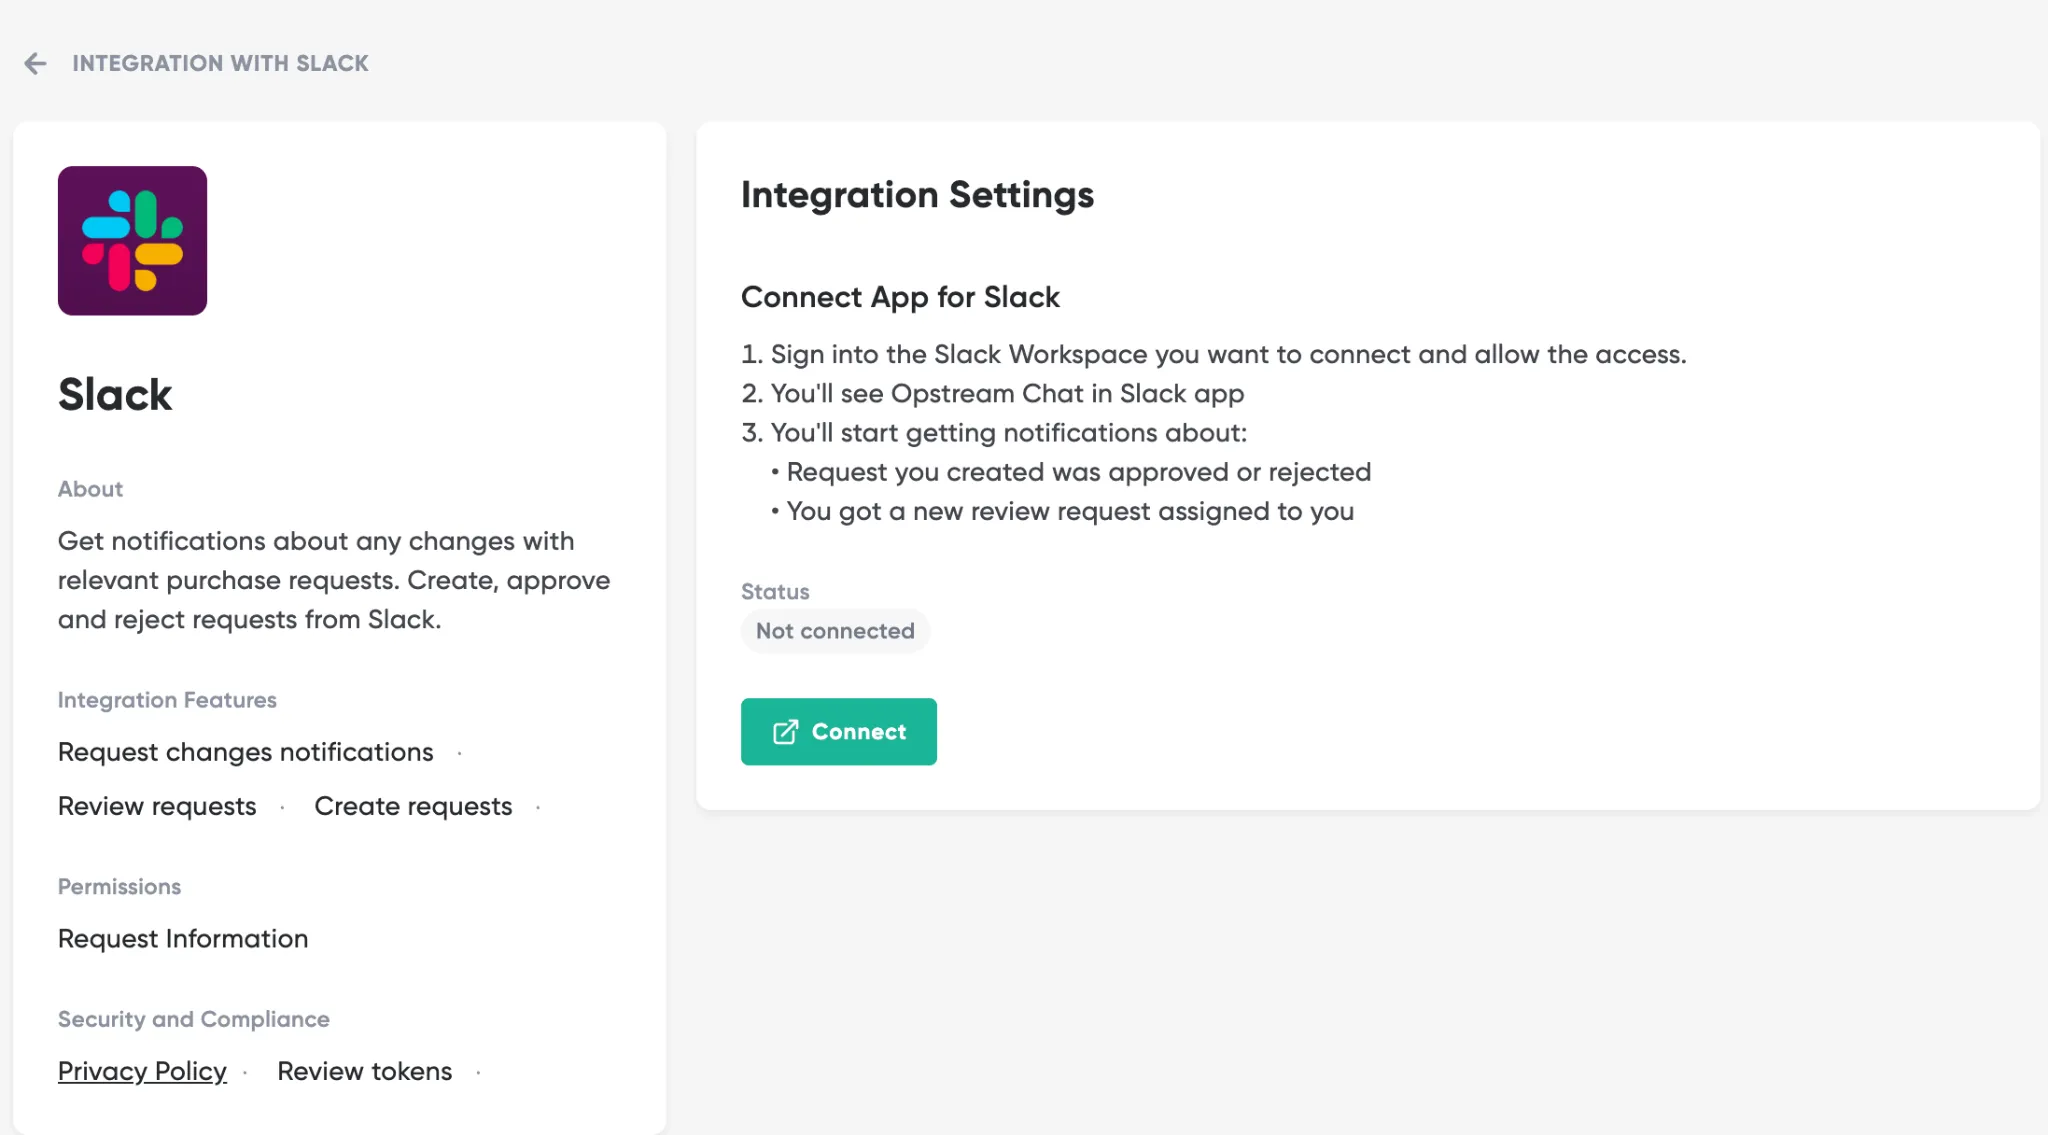
Click the tile to open its detail page (“Integration with {name}”). The left panel explains what the integration does (About), its features, and required permissions. The right panel (“Integration Settings”) shows the Status and setup - numbered instructions (for Slack/Teams) or configuration fields (account ID, keys, tokens for NetSuite, DocuSign, Priority, Ironclad, Anaplan, Workday, JD Edwards, Dynamics 365). Many connectors include a link to a separate integration guide.
Fill in the configuration fields and click Save & Enable, then confirm the install. To change settings later, edit the fields and click Save Changes. Saved keys and passwords stay masked. Use Disable to turn the connector off for the whole organization without deleting its configuration. NetSuite, Workday, Microsoft Dynamics 365, Priority and Coupa also offer Sync manually to start a data pull right away, without waiting for the next scheduled sync.
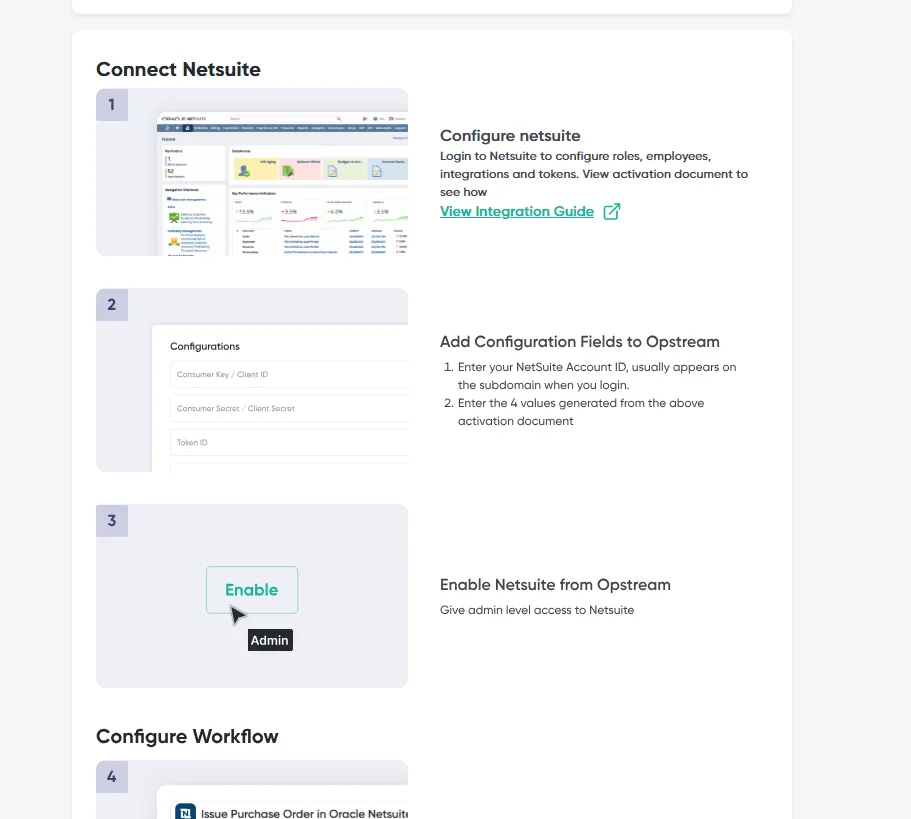
Most detail pages also include a Connect {name} guide. It walks you through adding the integration’s step to a request type in the Schema Editor and then pushing it live, since connecting an integration does nothing until a workflow uses it.
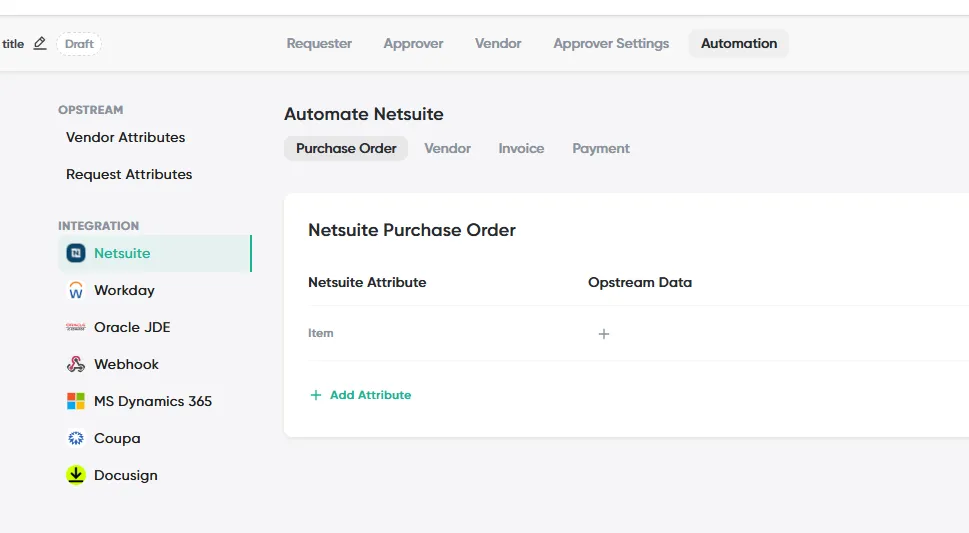
Cross-reference: connectors power features elsewhere - the Automation tab of a schema pushes data into NetSuite/Workday (§5.2.7); e-signature via DocuSign appears in document workflows (§4.2.9).
5.8.3 Personal Integrations: Slack and Microsoft Teams
Slack and Microsoft Teams are the only integrations every user can see on the Integrations page. Each person connects them for themselves. They are not switched on for the whole organization.
-
Slack: click Connect and approve the Opstream app in Slack. You then get notifications in Slack when a review is assigned to you or your request is approved or rejected, and you can approve, reject and create requests from Slack. To disconnect, remove the app in Slack.
-
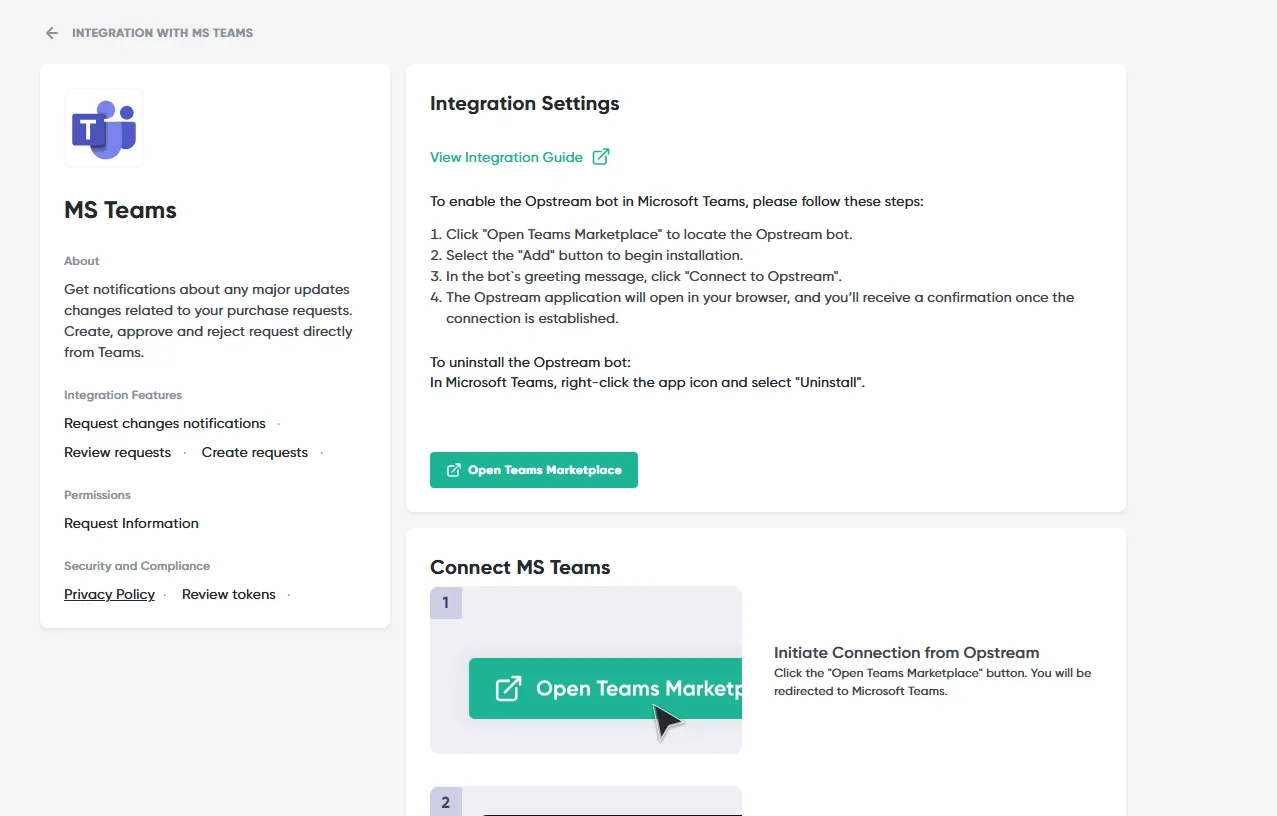
Microsoft Teams: click Open Teams Marketplace, add the Opstream app, then click Connect to Opstream. You then get Opstream notifications in Teams. The Approve and Reject buttons on a Teams card open the request in Opstream, where you complete the decision. To disconnect, uninstall the app in Teams. A setup guide is linked from the detail page.
Disconnecting only affects your own account.
5.8.4 What Each Integration Does
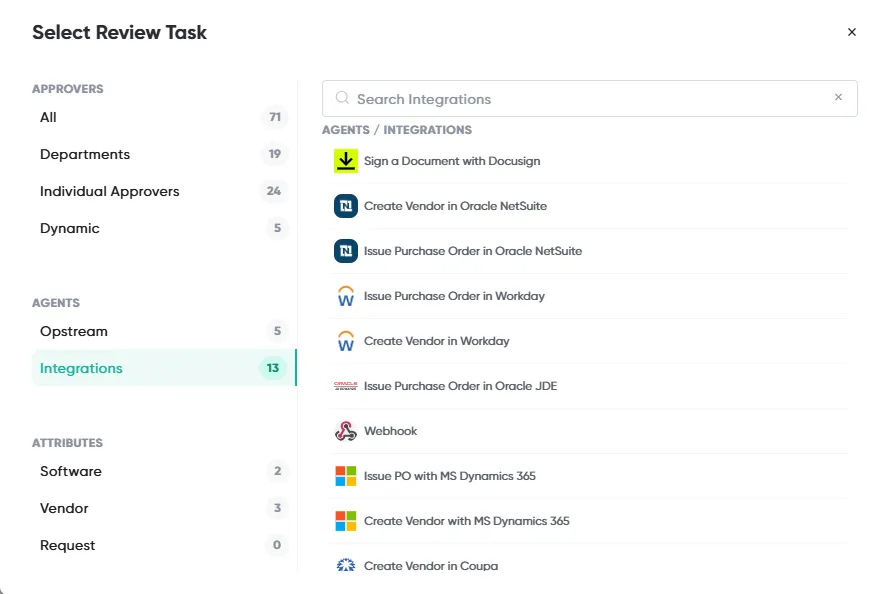
The table covers the integrations you can configure yourself from the Integrations page. Most other tiles in the catalog are Available on demand: email Integrations@opstream.ai and the Opstream team will scope and enable them with you.
ERP and procure-to-pay
| Integration | What it does in Opstream | Where you use it | Connect with |
|---|---|---|---|
| Oracle NetSuite | Syncs vendors, items, purchase orders, invoices, payments and custom lists. Creates vendors and purchase orders in NetSuite. | Data Source questions; steps Create Vendor in Oracle NetSuite and Issue Purchase Order in Oracle NetSuite; Automation tab field mapping | Account ID, Consumer Key, Consumer Secret, Token ID, Token Secret, Folder ID |
| Coupa | Syncs suppliers, users, lookups (such as cost centers, GL accounts and commodities), purchase orders and requisitions. Creates and updates suppliers. Creates a pre-approved requisition in Coupa that becomes a PO. | Data Source questions; Coupa Item Table; steps Create Vendor in Coupa, Update Vendor in Coupa and Create Requisition in Coupa | Base URL, Client ID, Client Secret |
| Coupa Punchouts and Hosted Catalog | Lets requesters shop a supplier’s punchout store or your Coupa hosted catalog and bring the items back into the request. | Coupa Item Table: Add from a Store (then Sync items after checking out) or Add from catalog (hosted catalog is enabled per organization) | Uses your Coupa connection |
| Workday | Syncs suppliers, supplier contacts, purchase orders, invoices, cost centers, companies, locations and workers. Creates suppliers and purchase orders. | Data Source questions; steps Create Vendor in Workday and Issue Purchase Order in Workday | Tenant, Username, Password (integration system user) |
| Oracle JD Edwards | Syncs suppliers, items, accounts, cost centers and purchase orders. Creates purchase orders. | Data Source questions; step Issue Purchase Order in Oracle JDE | URL, Username, Password |
| Microsoft Dynamics 365 | Syncs vendors and purchase orders. Creates vendors and purchase orders. | Data Source questions; steps Create Vendor with MS Dynamics 365 and Issue PO with MS Dynamics 365 | Tenant ID, Company ID, Base URL, Client ID, Client Secret, Environment, Scope |
| Priority | Syncs vendors (including bank and tax details, across several Priority companies) and purchase orders. Creates vendors. | Data Source questions; step Create Vendor in Priority | Base URL, Environment, Token, Password |
ERP data refreshes automatically on a schedule, from several times a day to daily depending on the system. Use Sync manually when you need fresh data straight away.
Contracts and e-signature
| Integration | What it does in Opstream | Where you use it | Connect with |
|---|---|---|---|
| DocuSign | Fills DocuSign templates with request data and collects signatures from employees and vendors. Tracks the signing status. | Step Sign a Document with Docusign; Automation tab Automate Docusign Templates | Accept Authorization (sign in to DocuSign), then DocuSign User ID and Connect Key |
| Ironclad | Starts an Ironclad contract workflow from a request and tracks its status. Brings contract records into vendor documents. | Step Manage Contract with Ironclad; Automation tab Automate Ironclad Workflow Creation | Client ID, Client Secret, Ironclad user email |
Security, ticketing and automation
| Integration | What it does in Opstream | Where you use it | Connect with |
|---|---|---|---|
| Panorays | Pulls vendor risk ratings and starts security assessments. | Step Track Vendor in Panorays; Data Source questions | API Secret |
| ServiceNow | Opens a ServiceNow ticket from a review step and holds the step until the ticket reaches the state you choose. | Step Manage Ticket on ServiceNow | Instance URL, Username, Password |
| Jira | Creates a Jira ticket when a review starts. | On a User Approval step, turn on Create a ticket in Jira and enter the Jira webhook URL | No credentials; click Enable |
| Webhooks | Sends the request data you choose to any URL. | Step Webhook; Automation tab Add Webhook Payload (see 5.2.8) | No credentials; click Enable |
5.8.5 Good to Know
- Disabling affects everyone. Disabling an organization-wide integration turns it off for all users and workflows. Steps waiting on that system, such as a ServiceNow ticket, stay blocked until it is turned back on. Data already synced into Opstream is kept.
- One vendor per ERP step. Steps that create a PO, vendor or invoice in an ERP work on requests with a single vendor.
- Coupa approvals. A requisition created through Opstream is already approved, so it skips Coupa’s own approval chain. If Coupa rejects it anyway, the Opstream step shows an error instead of rejecting the request.
- Punchout carts. After checking out in a punchout store, go back to the request and click Sync items. Items don’t come across on their own.
This site uses anonymous analytics to work out which pages are useful. Visits are not tied to anyone, and nothing you type is recorded. See the Opstream privacy policy.